Introduction
Welcome to the Overview for a project to model the accessories for a Testament cosplay from Guilty Gear Strive.
Most Projects that get built are done so because the item, game or character has a great personal appeal to me. This, however, is the second project I’ve taken up because of someone else’s love for a character (the first being the Azakana Blade from League of Legend’s Yone).
While that sword I built to completion and documented it, this accessory kit does not have a Prototype/Final article. As such, more detail will be in this Overview (though less in the section where I talk about the character).
These unlicensed designs were originally a commissioned cosplay request and the STL files are now being made available! Click the link below for the Print It Yourself Listing on Etsy, and make sure you check out link to the Assembly Guide.
Testament
Kind and gentle, Testament was a noble soul who placed the needs of others before their own, wanted to protect the innocent remembering their oath as a knight even decades later, and dutifully wished to repay Kliff for his kindness.
Yet, the forced conversion caused Testament to become extremely distrustful of humans and cynical. The annihilation of mankind, however, is not something they truly desire. Kliff attributed such madness to whatever Testament saw during the war, all the bloodshed, but it was a command forcibly planted by Justice. Because Testament had a strong will, emotional fortitude, and great love for Kliff, they were semi-independent from her orders, retaining their consciousness and memory but unable to disobey.
The Accessories
I’ve seen the amazing kits made by Dangerous Ladies over the years (who as far as I’m concerned are the very best at what they do!) but never thought to try multiple smaller pieces for a character rather than a larger, flashier item like a sword or crown.
Unsure if it would be a viable option after being asked about it for a commission, I said I’d give it a go before properly accepting the task. As this article is being written to accompany the release of the files, you can safely say this was a resounding success.
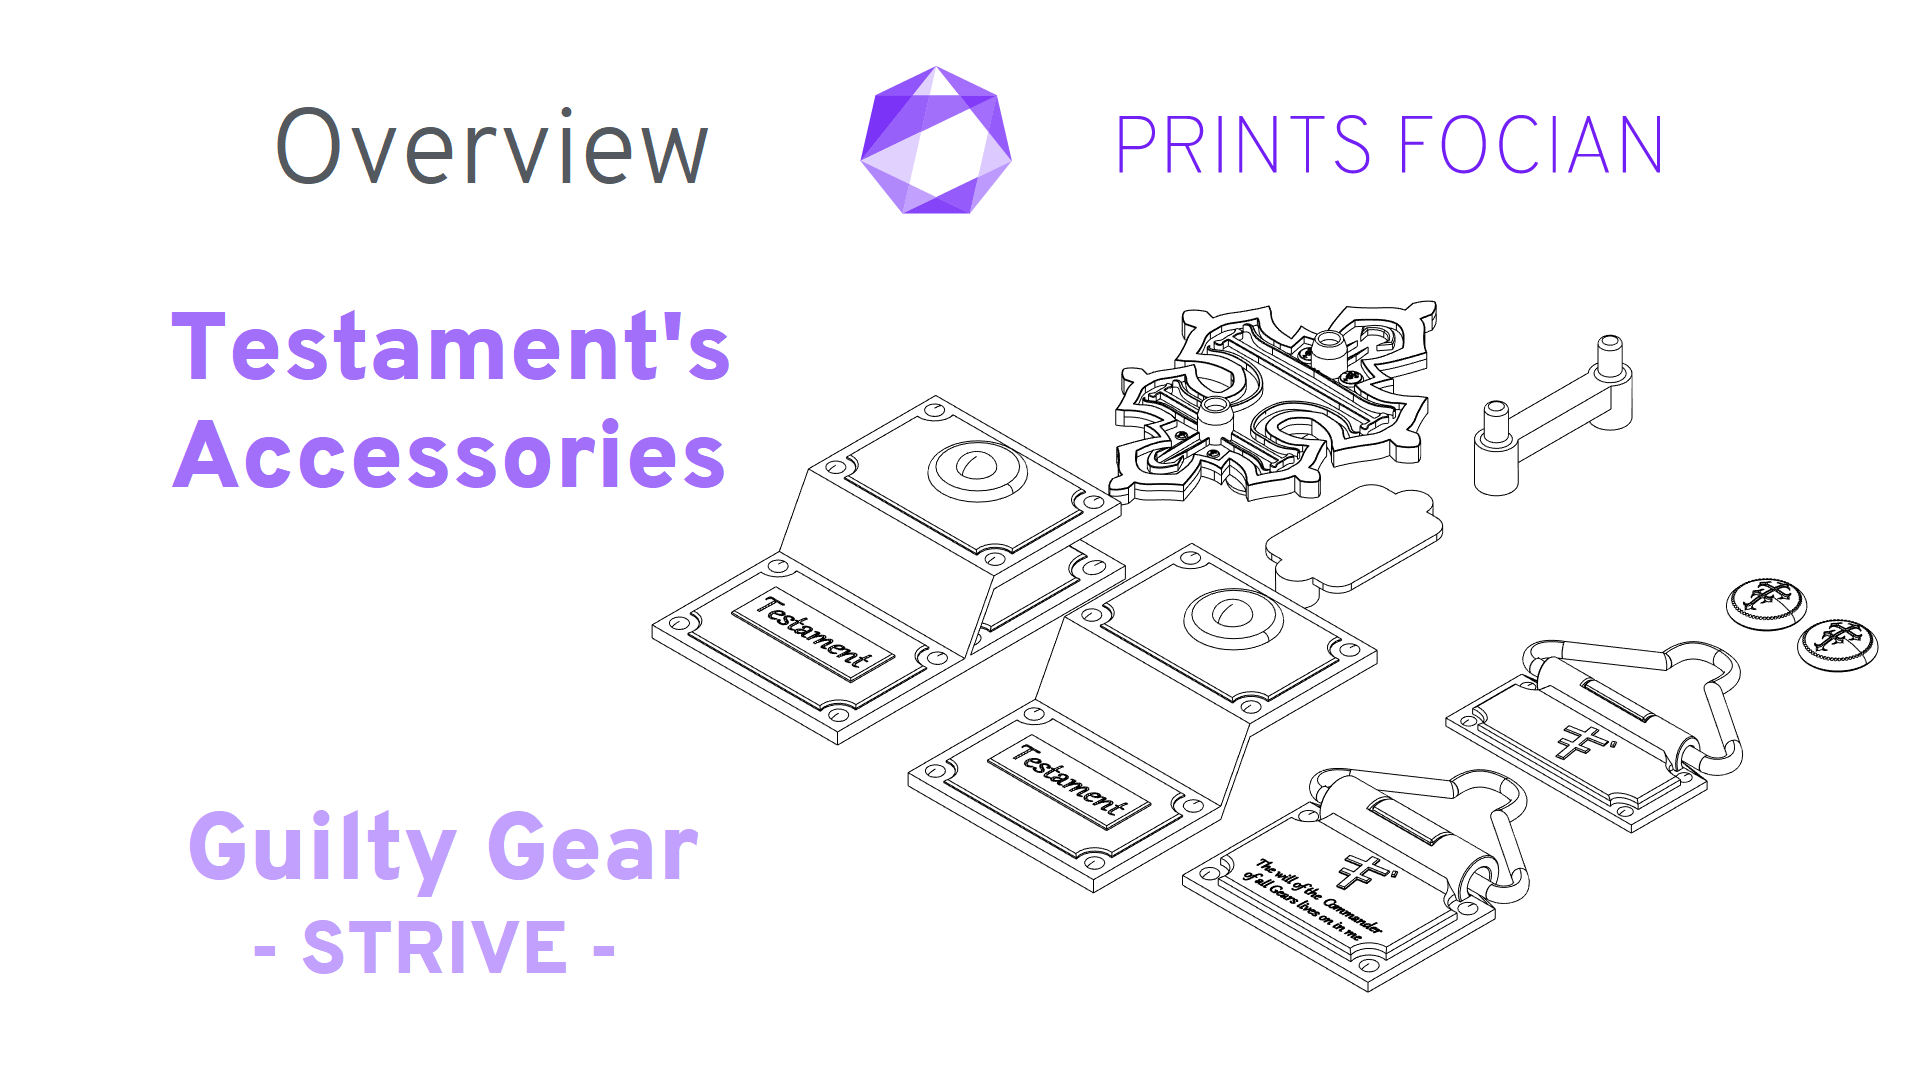
Excluding the scythe and the skulls, these were all the items requested for the build:
")
Button:
")
Multiple simple round buttons adorn the length of their coat. There is a double-crossed symbol either embossed on or impressed into it, and a hard-to-see detail that runs parallel between the symbol and the outer edge.
No clear display of how it is affixed is present.
Process:
For the shape, I’ll be squishing down and sphere and flattening the bottom. The symbol on the face should be easy enough to sketch out, then make an impression of.
The detail around the edge will be the same body as the button itself, but scaled down and run around the inner edge of the button a few dozen times.
Sewing is not a skill of mine, I’m sorry to say. For that reason, I can’t use any earned experience to make the attachment any easier. I have no idea if tunnels through the button are better than a protrusion to thread through, so I’ll make both an option.
Slanted Clip
")
This is a large clip fixed to the coat. It has two flat sections of metal work with detailing and a border on them both, and they are connected by a slanted section. The bottom part is about twice the length and I am assuming half of it goes under the coat. The detailing on that plate contains text, and there is a small round symbol on the upper plate.
The text is not visible and the symbol isn’t recognizable, more likely a small piece of decor.
Process:
The body of this item is a simple fusion of a few basic shapes, but the detailing gives options.
The metal plate is a simple sketch and extrude, but the text will be quite small. This is designed for a resin printer, so it should still be legible once close enough. It will be the character’s name on the plate, but a little sanding can make it illegible (both as an option and a warning!).
There will be two versions of this, one will have the bottom plate being the full length, and one with it ending at the slant. Much like the buttons, this will allow more choice when it comes to attaching it.
Hinge Clips
")
A solid clip attached to the coat houses a hinge, shaped somewhat like a coathanger.
There are also smaller versions with slightly different dimensions. And while it could just be the detail in the image, it appears that the larger versions have a symbol and text under it, while the smaller ones appear to have the symbol with no text.
Process:
")
This is new, moving parts!
The primary concern on this will be the assembly order. Ideally, each part will be able to be finished, and the clip assembled around the hinge to allow it full freedom of movement. As it is intended for a resin printer though, I’ll not recommend allowing it to bear any weight.
Both the text and symbols will be put in place in the manner outlined above with the buttons and clips.
Skull Plate
")
Half a skull is attached to a plate that is styled in the fashion of the double cross symbol mentioned in the button section above. It has a large border to it and appears to have defined ridges within the borders.
Process:
The outline of the item will need to be sketched, then the ridges and detailing added in after.
A clip on the back to attach to the user will be helpful here. The plate will be made as a mount, with a number of options on how to attach the skulls to it.
For the skulls themselves (which are not included), a cheap Halloween skull with the front third cut off and mounted on the corresponding plates is going to get the best result.
The Result

Thanks for reading!
If you enjoyed this perhaps you would like a different Project?
Love what you saw? Got a project in mind? Feel free to reach out and let me know!