Introduction
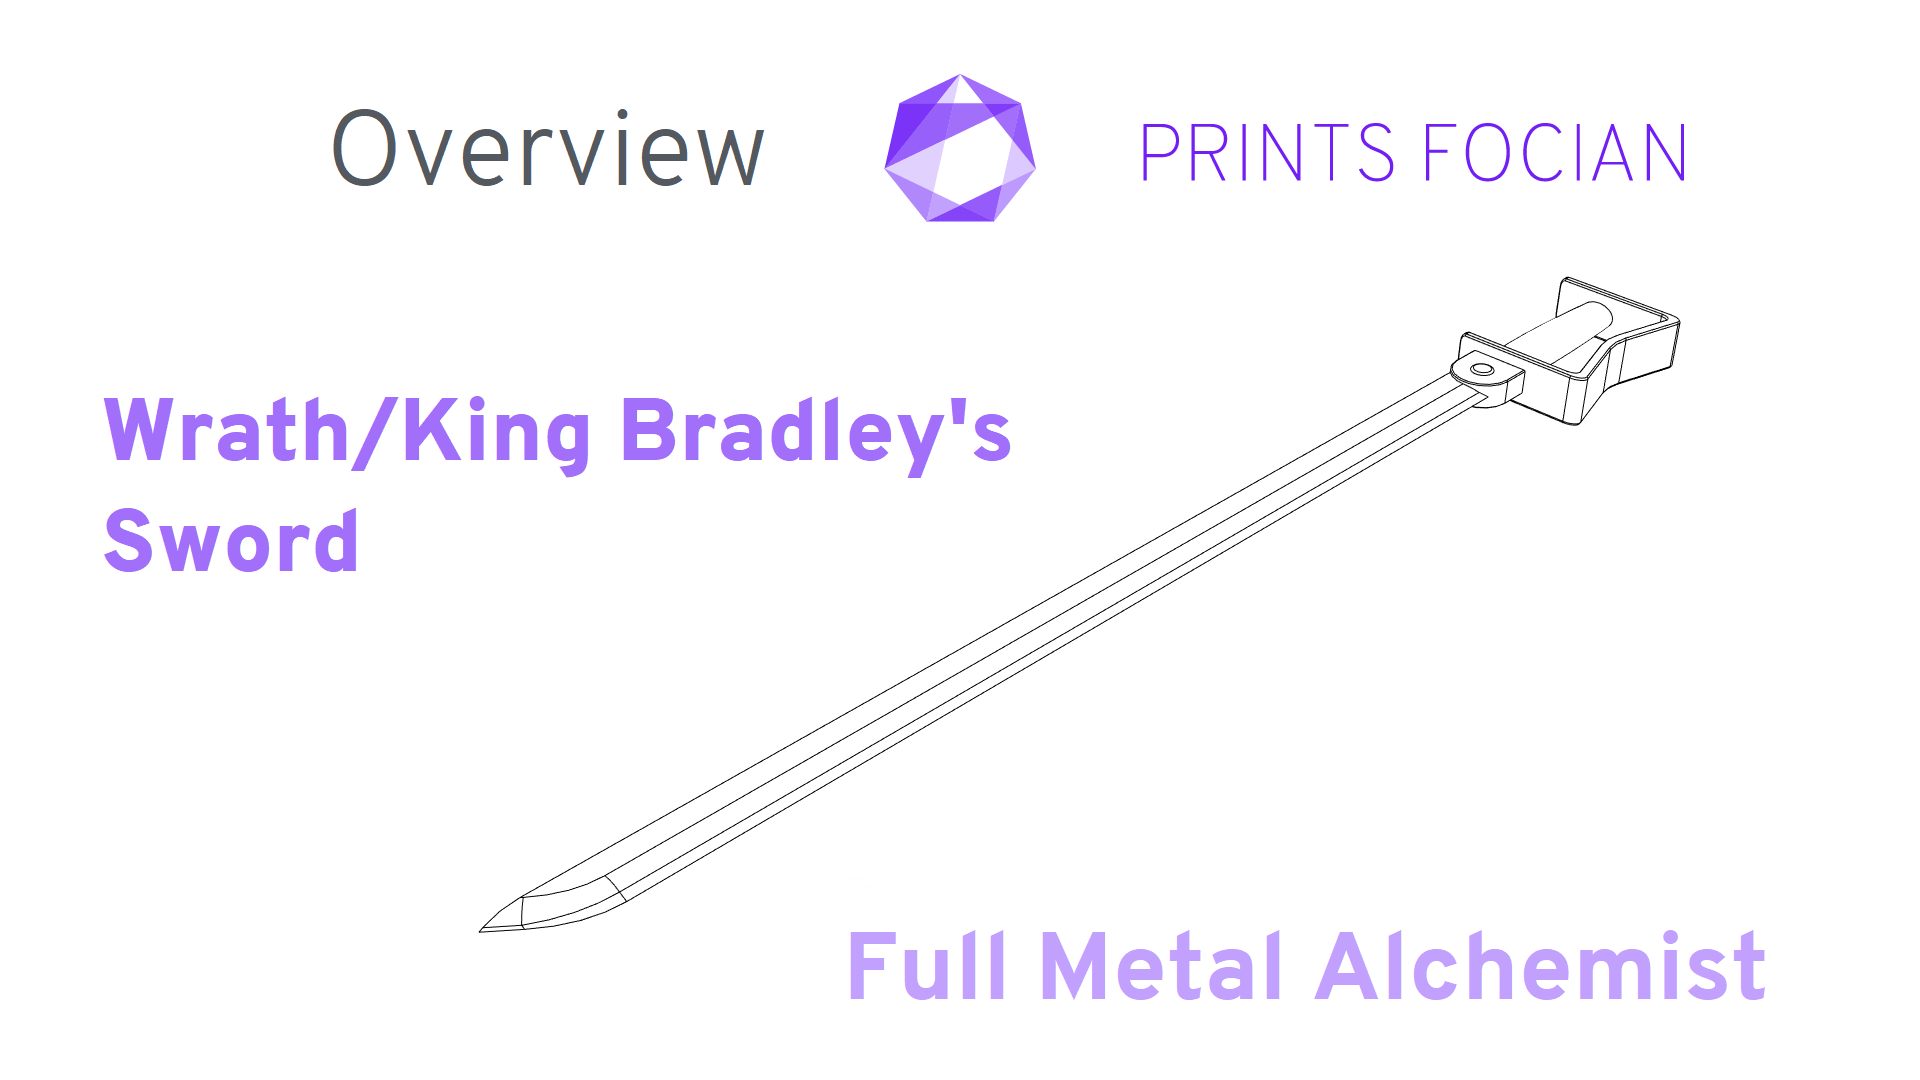
Welcome! In this build guide I’ll be walking you through the process I took in making a cosplay weapon inspired by Wrath/King Bradley’s Sword from Full Metal Alchemist and FMAB.
This will be an intensive look at the Prototype I version of this project from start to finish. It doesn’t matter if you’re looking for guidance with a Build Kit, thinking to Print It Yourself or just curious to see the project: You’re in the right place!
While this unlicenced replica is intended for decorative purposes or for use as a cosplay prop, the main reason for building it is because I have the design ready to go!
Given the similarities between this sword and General Armstrong’s, the normal prototype issues should have been worked out with her weapon, right? As is often the case, this was intended as a Final model straight away. I’m sure you can tell from the title, but something went wrong… In theory, all models start out as Final versions, and one day I may get a Final Verison on my first go. But not here, not now and today.
Check out the link at the bottom of the page for the Overview if you want to see more!
Design
The bulk of the time in the design phase was spent making a few tweaks to accommodate the differences between Wrath’s and General Armstrong’s sword. Her weapon made for a great starting point!

I needed to change the cross guard a little bit as well. While there are a couple of versions Wrath uses that include the same one I had previously designed, it was rare. This one is not rounded and does not have the studs.

The handle would largely be untouched, same with the hilt and studs. The blade needed the engravings removed, these were definitely easier coming off than going on!

After that, it was time to change the size of the blade. I wanted it a little thinner than the Armstrong Sabre and roughly the same length. My aim is for between 10-12mm width, and no more than 950mm length. I put a block to the right of the blade that is 950mm.

Design phase complete! Time to begin the construction!
Build
Usually, I print each component off one by one, but I thought I’d just try and do the blade in a single go.

How did it turn out as one file to print?

Pretty damn great!

With the components are printed it was time to get the blade together!

In the past, I’ve used a few different joining mediums such as acetone and super glue. I’m giving a try to Gorilla Glue here though. It is insanely strong, but more importantly, it expands, which makes it ideal for securing the metal rod and the blade sections together.

Unfortunately, the 6mm hole for the 6mm rod gave me a few issues when securing everything in place, leaving me to believe I had much more clearance than I actually had. The supporting rod protrudes down about 25mm further into the handle than it should, ehh, user error. When I adjust the design, and for all future 6mm rods, I’ll be using a 6.5mm hole and expanding glue.

The handle has been SLA printed using Elegoo Water Washable Clear Red Resin.
I can still move forward with this prototype, because I can hide the extra 25mm behind the cross guard. In order to do that I’ll need to carefully drill further into the handle later and hope there is enough room for the whole bar. Carefully drill. Carefully. Careful careful.
Carefu- ****!!

Okay… a couple of problems now, but nothing too serious. I can use an epoxy putty on the hole and mold it into shape. As for the rod that is now longer at the bottom than I want it to be? I’ll either saw off the bottom of the rod, buy a shorter one or use the crossguard to hide it. Either way, the work continues on Prototype I, but this is about the stage I started working on Prototype II.

I began working on Prototype II, but once it roughly caught up with the progress of the first, I put the project down for a while. This has been dormant for many months, and in that time I have changed a couple of things.
First, the thinness of the blade that I wanted at the start of this design was a little more problematic than I’d thought. The sword can almost disappear when the edge is facing the camera if it is too thin, and I also have less surface to work with for the notches I want to make at the seams.
Secondly, I have modelled a Sheath for use with General Armstrong’s sword, and want it to fit this design as well.
As the “Final” version must be the design I use for the Build Kits and 3D Files, both of these prototypes are now in a state of limbo. But what to do, what to do?
No. I learned my lessons following the first Prototype of Tidus’ Longsword… Cut my losses and learn when an ongoing project may be best to evolve into a… “long-term WIP”. Prototype I & Prototype II may never be progressed further along, however, a Final model of King Bradley’s Sword still needs to be made! I am set on a (mostly) Final on General Armstrong’s Sword, so I will go back to the drawing board and use that again for the Final for Wrath’s Sword.
Watch this space!
Result
This is both Prototype I and Prototype II, for now heading to a storage space till I think of something good to do with them.

Thanks for reading!
If you enjoyed this, you might like some of the related articles from the Overview, or perhaps a different Project altogether?
Love what you saw? Got a project in mind? Feel free to reach out and let me know!