Introduction
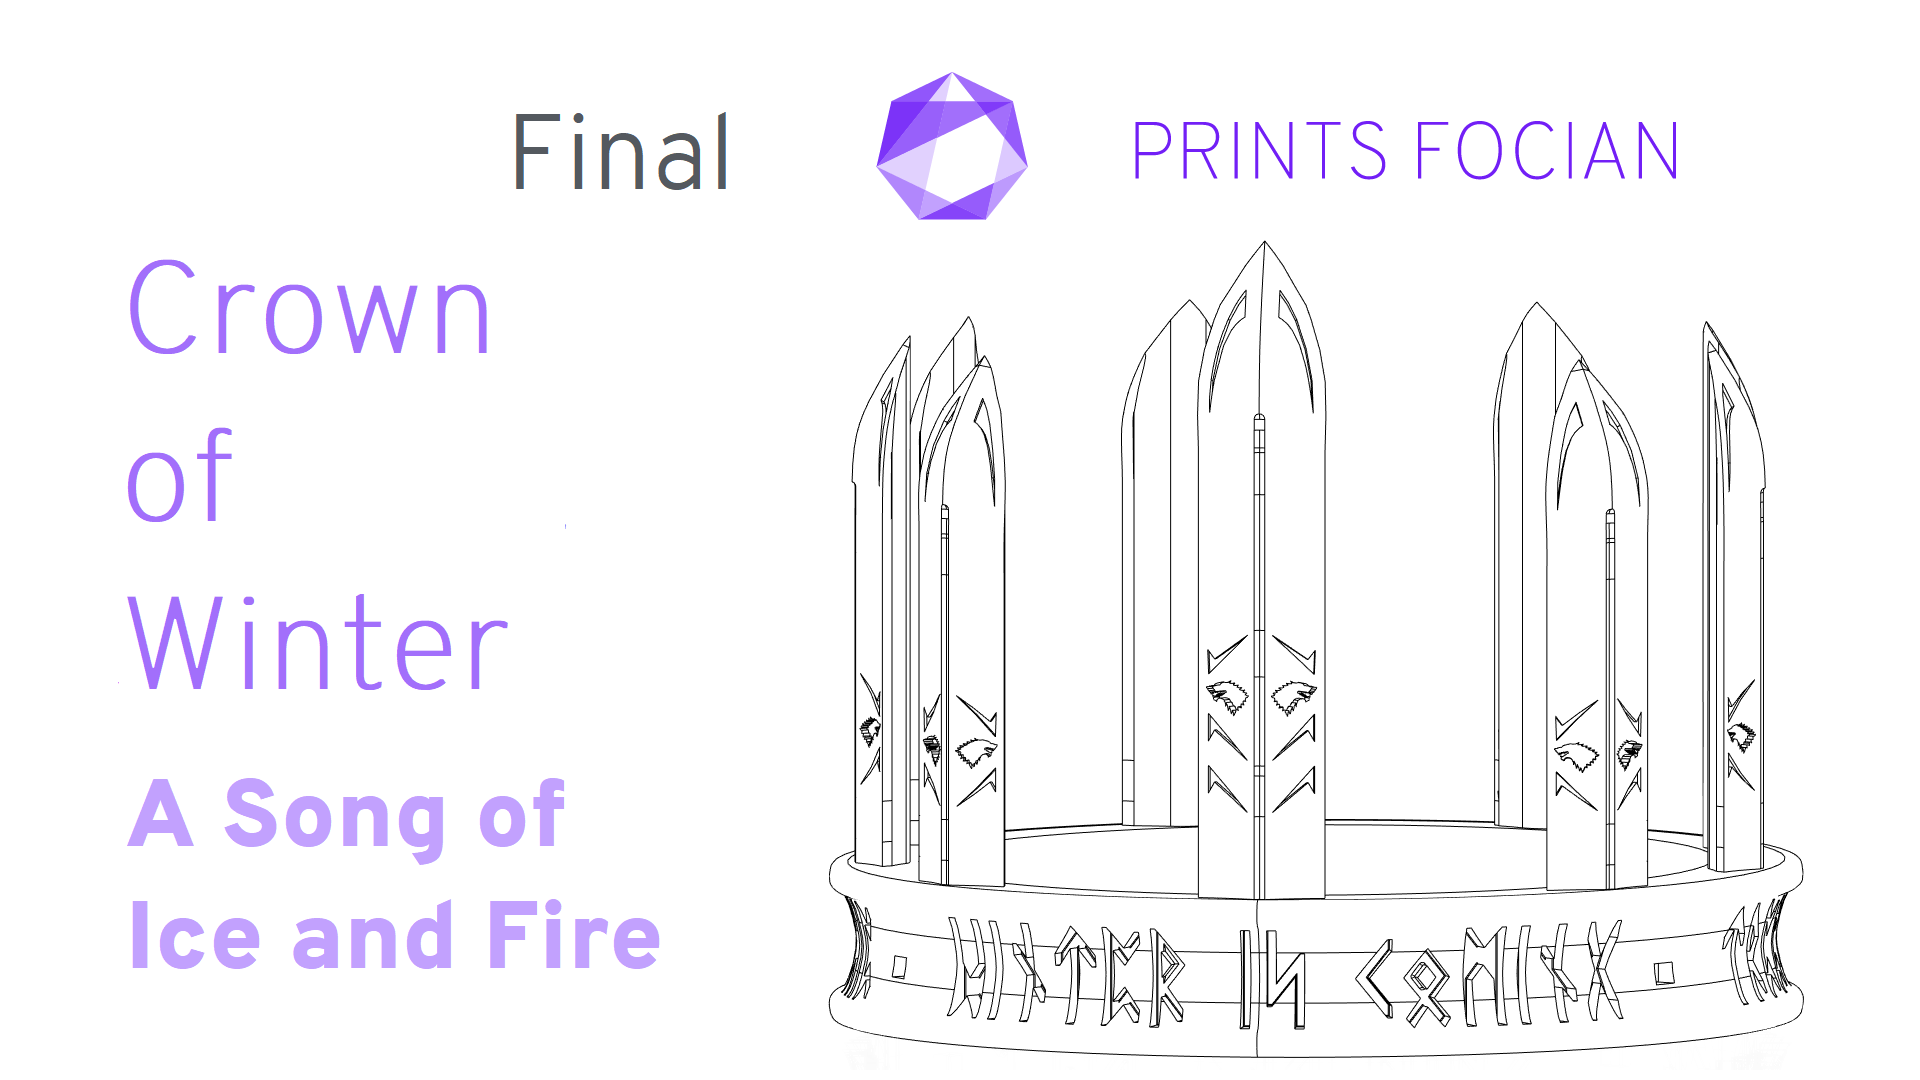
In this cosplay prop creation guide I’ll be walking you through the process I took on the Final iteration of the Crown of Winter, Robb Stark’s crown from A Song of Ice and Fire, a series of novels that inspired the hit HBO TV series A Game of Thrones.
This unlicenced ASOIAF replica is perfect for decorative purposes or as a cosplay prop for either Lady Stoneheart or for the young wolf himself. Available as either a life-sized or mini version, you also have the choice between a final finished piece, Raw & Premium Build Kits or the option to print yourself.
This will be an intensive look at the final revision from start to finish. It doesn’t matter if you’re looking for inspiration with a Raw or Premium Build, thinking to Print It Yourself or just curious to see the outcome: You’re in the right place!
While this unlicensed replica is intended for decorative purposes or for use as a cosplay prop, the main reason for building it is because there is no current item that could better gauge my skill growth! With this final revision, I hope to be able to craft a fantastic and desirable product!
Post Publishing update: please excuse the brazen shoehorn of certain terms here, and a few more times in the upcoming article: Crown of Winter
Unlike other articles, this will be detailing the life sized and mini versions simultaneously. The process for each item is identical, and there may be steps that are shown for one but not the other, and vice versa.
Design
After three successful Prototypes and a commission of the previous design, it was time to return to one of my earliest cosplay prop models: Robb Stark’s Crown of Winter.
I had recently taken a commission on one of the previous designs that used some of the artwork in A World of Ice and Fire as a reference. What I thought was going to be an hour of tweaks to a design I previously completed ended up growing into a mammoth of a project. I had forgotten that the previous iteration of Robb Stark’s Crown of Winter was made in 123 Design, and I had long since abandoned that for Fusion 360, so I had to make it from scratch.
With a couple of tweaks, such as runes inscribed around the inside of the circlet, this is what I was commissioned to construct, and also what brought me back to the design:
I love the previous design I did, but something had always bothered me about it. I based it on official artwork, but it never really matched the book description quite right to me. A great crown, but not quite the style I wanted to move forward with. While recreating the old design, my desire to sink my teeth back in and see what a few years of skill improvement can offer became overwhelming!
This time, however, I would only be using the following as my guide:
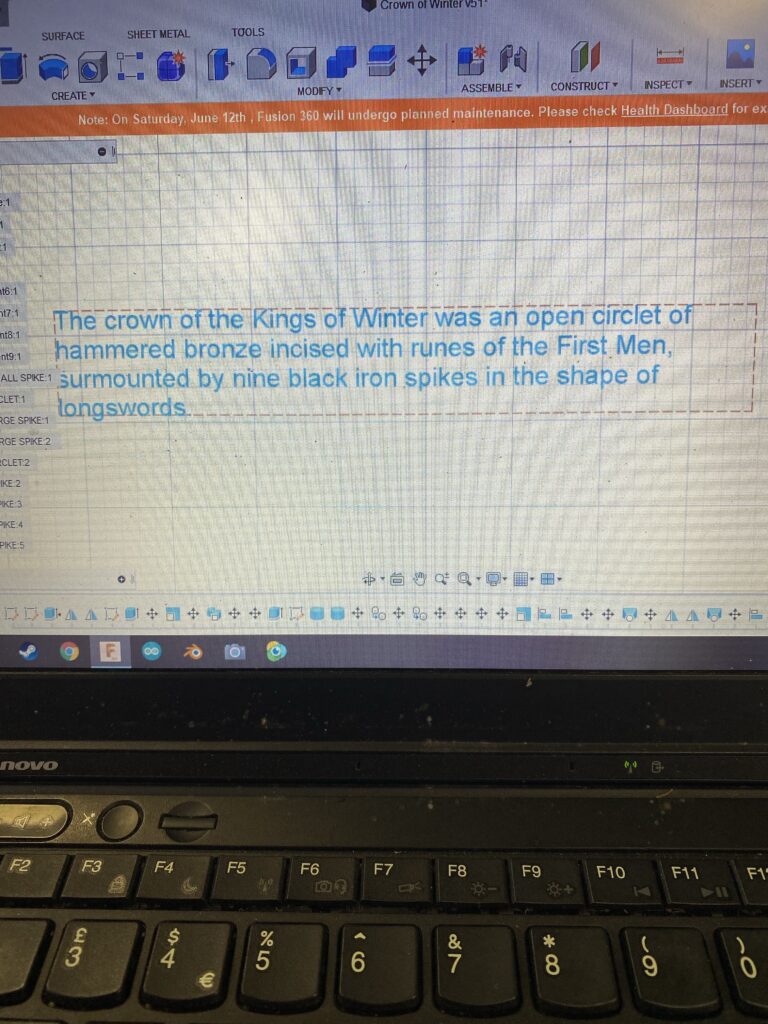
This was somewhat uncharted territory for me. I had always tried to replicate, but this was to be my first project with no reference image; just the book’s description of the crown. Although this offered a large amount of freedom, it also put me on a constant back and forth between parts of the design.
While it is very easy to compare a 3D Model to an image and say “yup, mostly accurate” or “nope, missed this detail here”, it is much harder to look at a part and think “am I really happy with this?”. There was so much back and forth caused by this, but it’s part of the process. Hopefully judging your own work while going along is a skill that takes time to develop (I’m hoping! If it’s a “you have it or you do not” then I’m utterly and completely screwed!).
The first part of the design I started work on was the “nine black iron spikes in the shape of longswords”. My previous design, and the original artwork, have the open circlet surrounded by nine small longswords. While others may justifiably disagree, I felt that mini longswords and “black iron spikes in the shape of longswords” were not the same thing. My goal here was to make it look like a spike first and foremost, and a longsword as the secondary concern. I wanted them big and chunky, and emanating from the top of the circlet, rather than the front face.
Love it! Looks like a spike, looks like a longsword! A little engraving here and there (not too much though, they are Northern people who value pragmatism over aesthetics) and the direwolf head looks rather cool! But… eh. I wasn’t 100%.
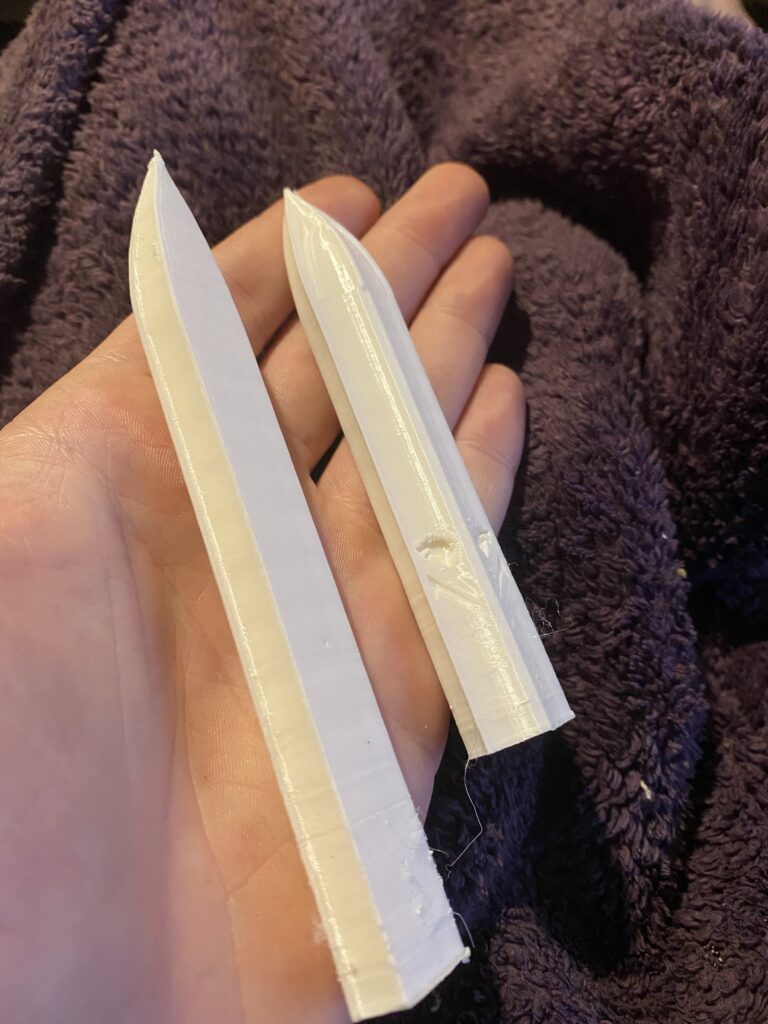
There was something not quite right, I couldn’t quite put my finger on what, but something was definitely wrong. So I moved it to the side of my workspace and rather than tweaking the one I’d worked on, I just started on that part anew. While doing this, I also printed two of the spikes I’d put to the side because… well, because I’d worked on it and wanted to click the print button. I can be impulsive at the best of times…
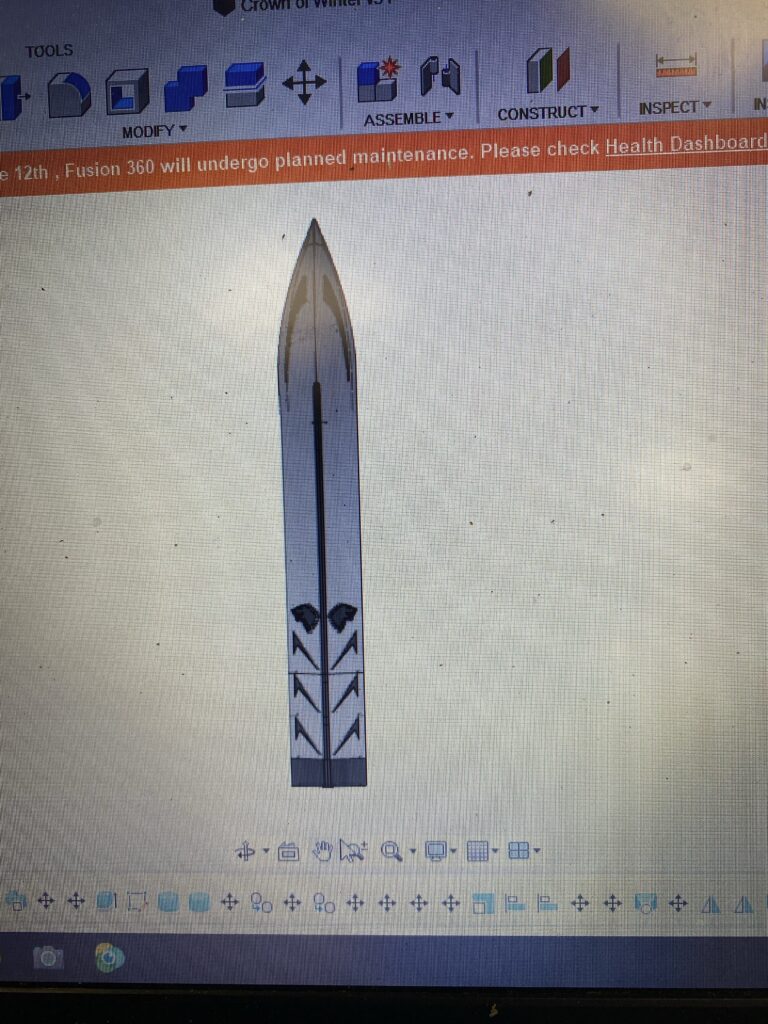
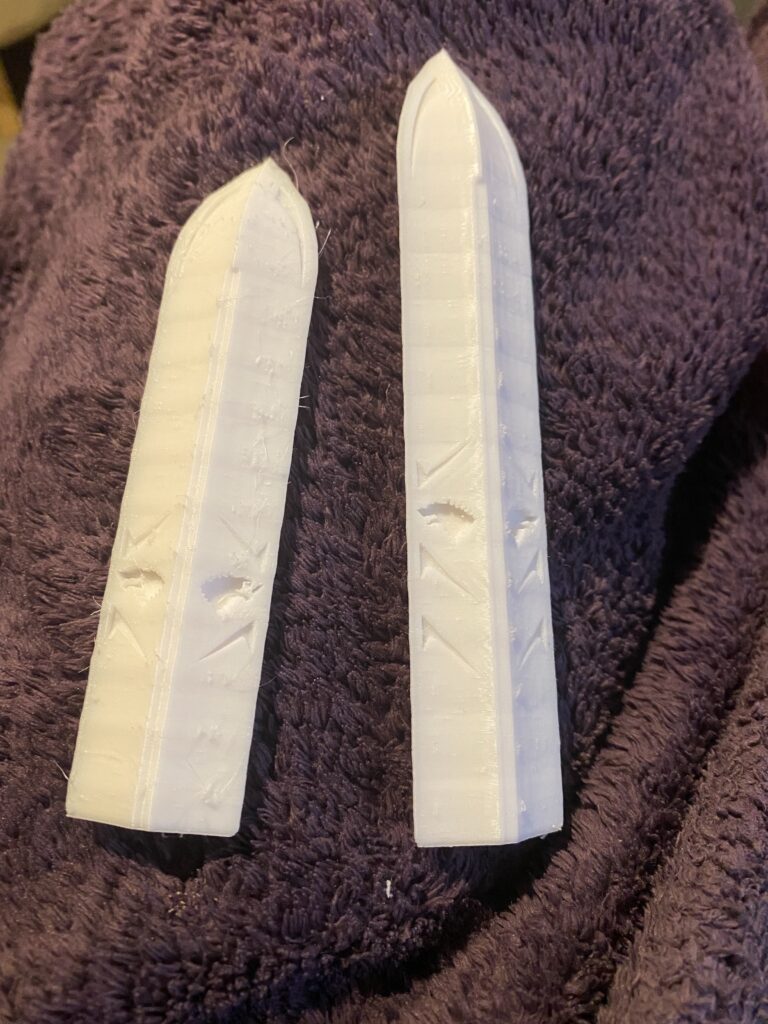
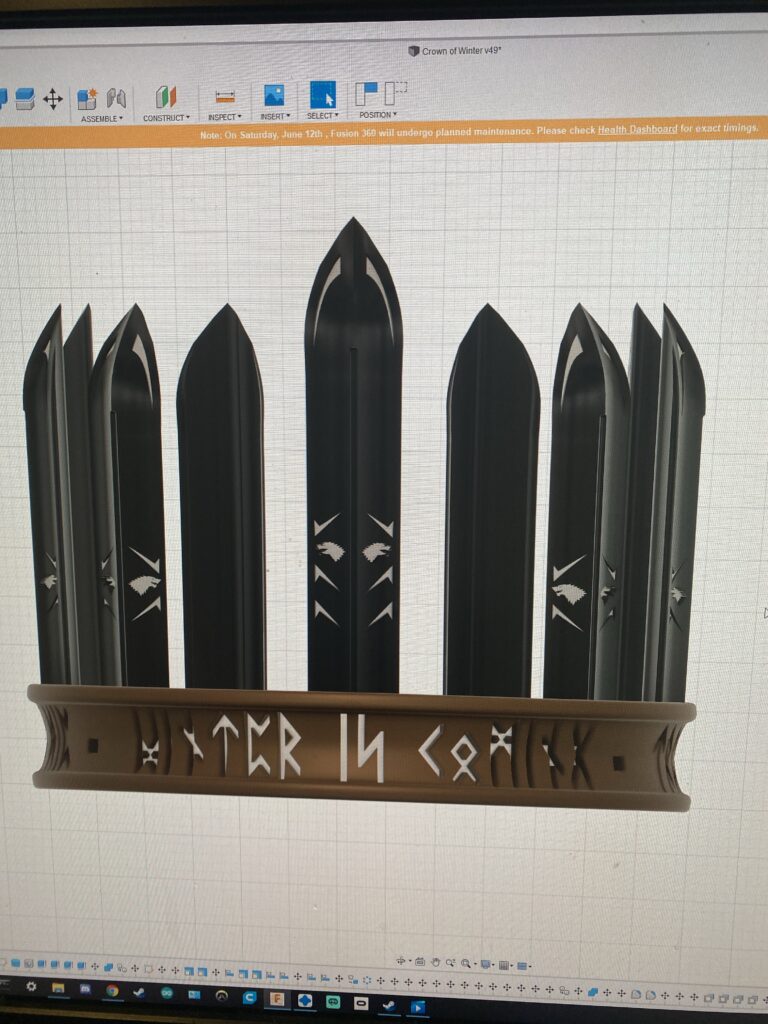
I tried again and this time put a flat face allowing for runes down the blade, as well as the Direwolf sigil that I liked to be larger and clearer. I also made them black and white in the design software just to make it easier to see the details. The Runes read “Stark” on the larger one, and “King” on the smaller version.
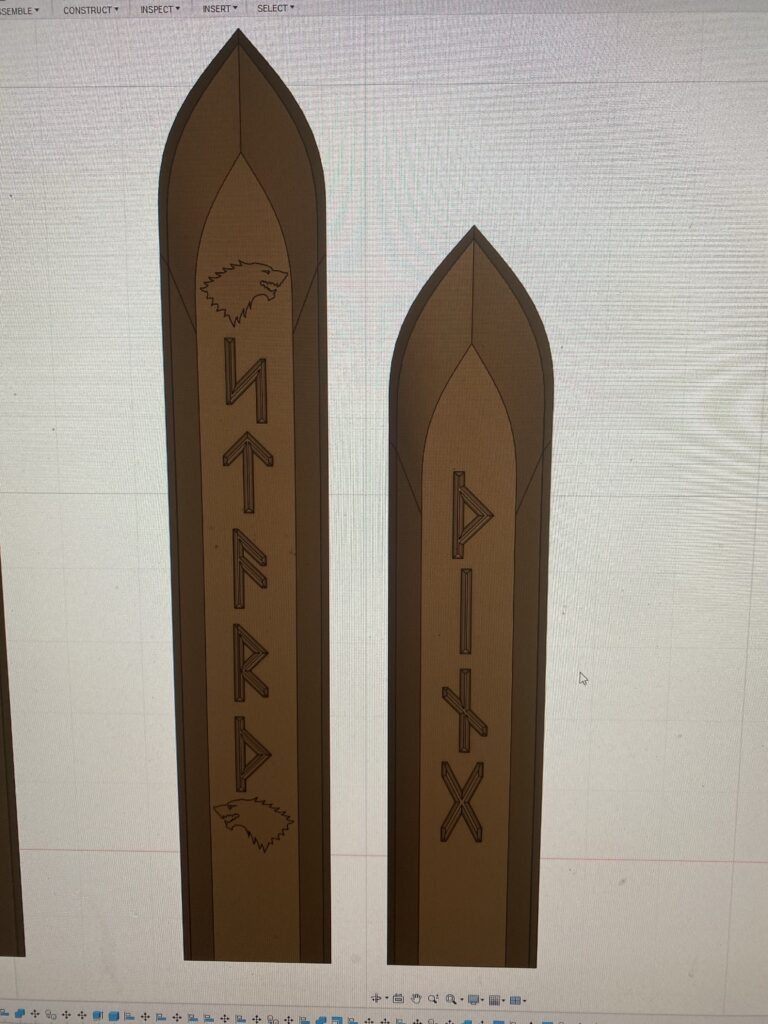
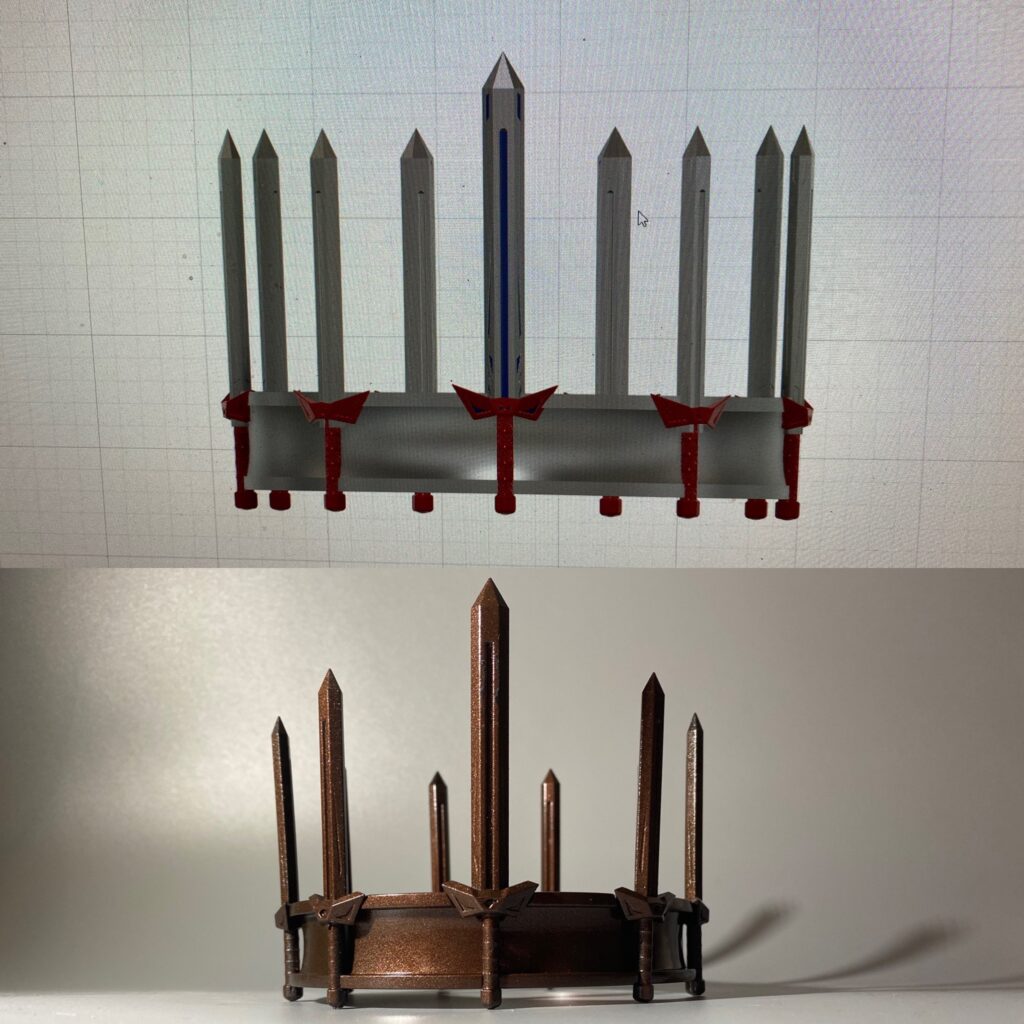
The spikes look good! Maybe not great? I placed them on the circlet to see what they’d look like. Still good! But is ‘good’, good enough?
Definitely looks like a spike, but not too much like a sword if I’m brutally honest; not good enough! Loved having the space on the face to work on, but I ended up getting pretty in-depth into what I wanted out of the runes, which I’ll elaborate on shortly. Hmm, that’s now a couple of spikes/swords that aren’t quite cutting it, but hard to define quite why. And then I took the previous spikes off of the printer.
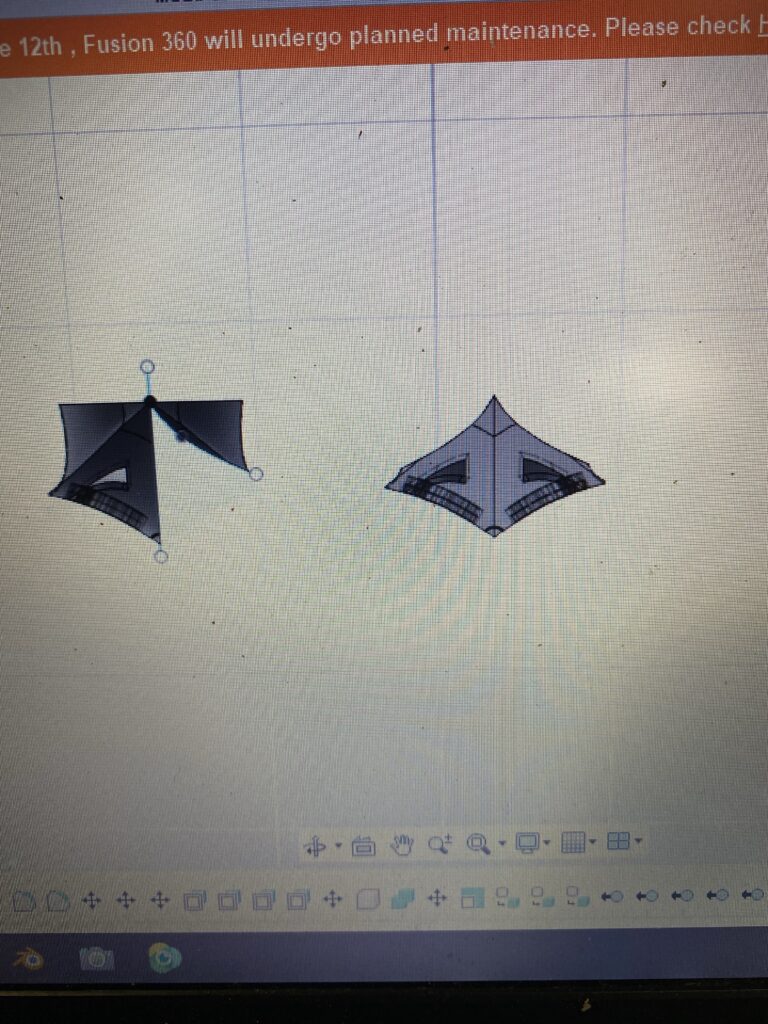
Okay, that first version was amazing and the printed version looks kinda incredible but more importantly being able to physically hold it has shown me what was not quite right about the design. The front is amazing, but the back is just a perfectly flat surface. I returned to the earlier spike and tweaked the back of it by cutting out a section of it (on the left), then mirroring it to create the full spike (on the right). The image below is of the top view looking straight down.
HUZZAH! That’s precisely what I wanted! The front looks perfect and the back looks great as well! That’s the design for the spikes done, although the high print speed and need for a little maintenance on the printer are both clearly showing.
I originally intended for the “open circlet” to be as simple as possible. Getting the perfect size for a crown can be difficult, I tried the first attempt with a 200mm diameter circle, then an oval measuring 215mm and 150mm, then lastly 215mm by 160mm.
Let’s sit and think about the runes for a moment. Oh, the Runes! I had always wanted to include them on every model of Robb Stark’s Crown of Winter I had done, but could genuinely never settle on something I was 100% certain on. I definitely delved into the “overthinking the little things” territory to some degree. My early thoughts were all about symbolism, with all of the smaller swords (representing the people) having “King” carved on them, with the large sword saying “Stark” (representing who the people have chosen as their king).
While the spike swords were there to depict the people of the North, I intended for the circlet to represent the land itself. I played around with a few words that seemed apt: North, Winter, Wolfswood and Children. Too much thought, not enough movement. I found myself once again going back and forth. Flailing around at the sheer amount of options and unaccustomed to working without a reference. But wait, I do have a reference! I checked the wording again, and realized there was no suggestion of runes on the spikes, only the circlet.
This is something that has been slowly running through the back of my mind since my first one of these and two things finally signaled an end to the problem of what runes to place and where:
1: I discovered I actually had quite a bit of room on the circlet, more space than I needed for “just a couple of words”.
2: I’m a big ASOIAF fan, I had spent a long time thinking of Northern-esque words to engrave on the circlet, but there is one phrase I’d never even once considered, much to my shame: Winter is Coming.
Once I knew the broadstrokes and options available, I spent more time considering exactly what to inscribe. To begin with I tried a short poem declaring five simple Northern axioms:
“Trees See
Raven Flies
Children Flee
Man Dies
Winter is Coming“
Personally, I absolutely *loved* this, like stupidly love this a lot. If I was designing a crown for myself, I would have that all over it without hesitation. But it’s not for me, it’s for a Northern King, and I didn’t feel that a poetic five-line stanza would be the most appropriate option. I love the simple self-evident truths being proclaimed, but needed to make it a bit more appropriate for the area and era it was intended to rule.
The final message of the runes running around the Crown reads:
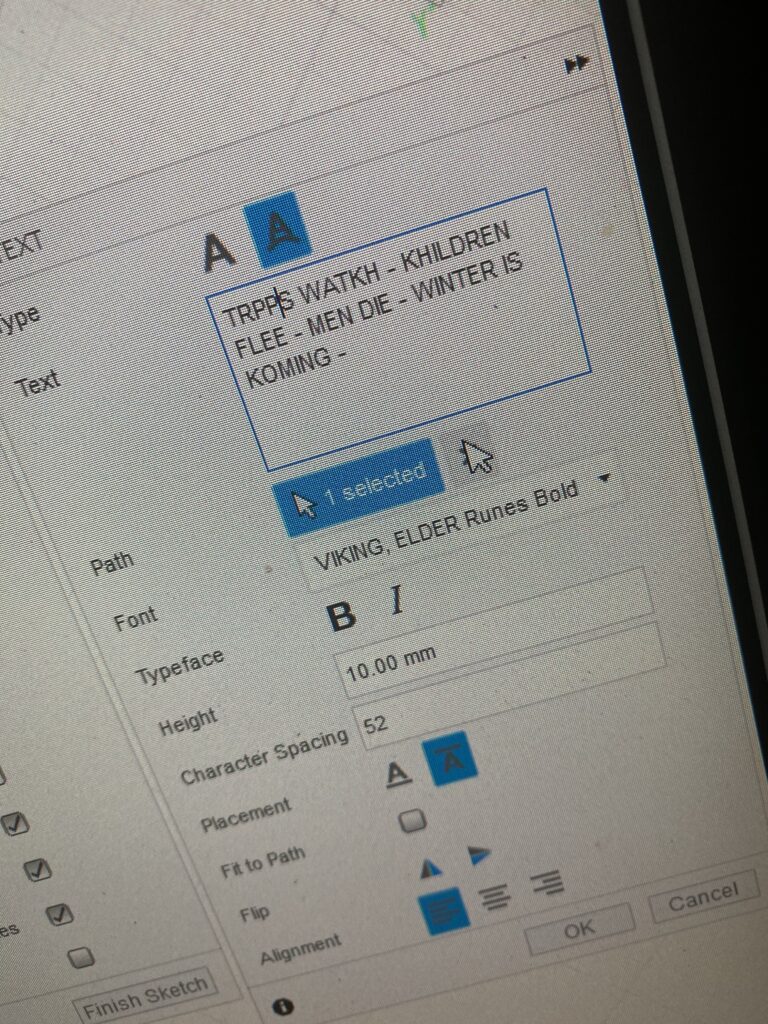
“Trees Watch
Children Flee
Men Die
Winter is Coming“
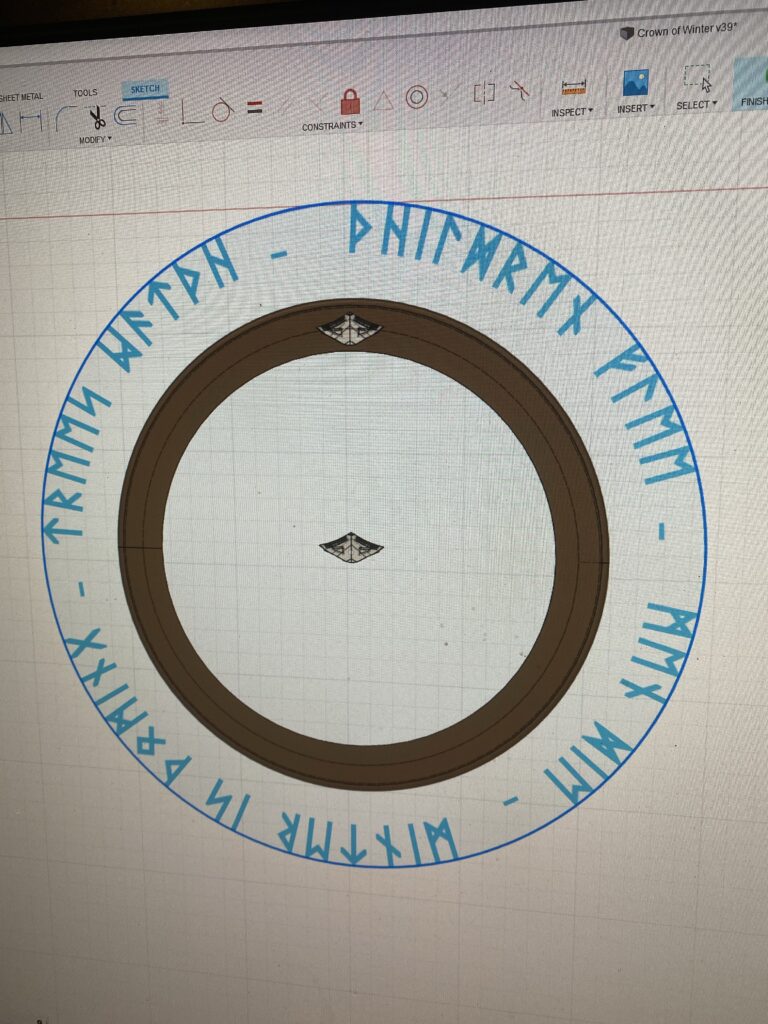
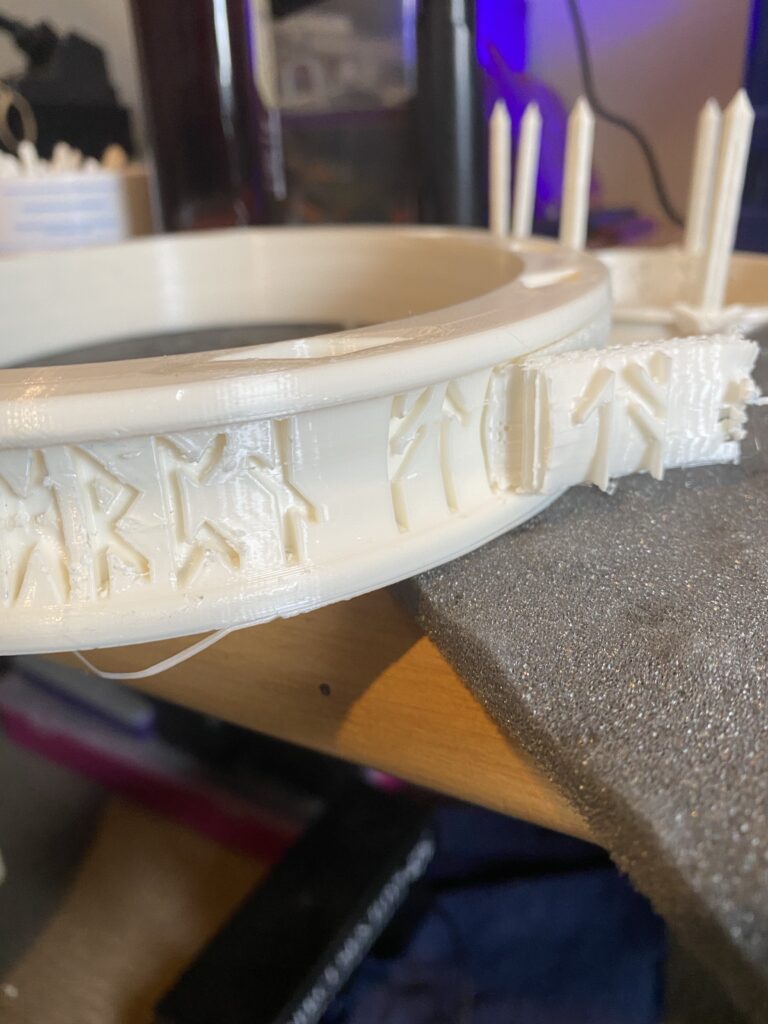
Once I knew what I wanted to be engraved, it was a question of how. I used text to path on a circle.
Some of the Runes in the font variant I used didn’t look too great or looked more like a different letter. I played around to try and get it looking just right.
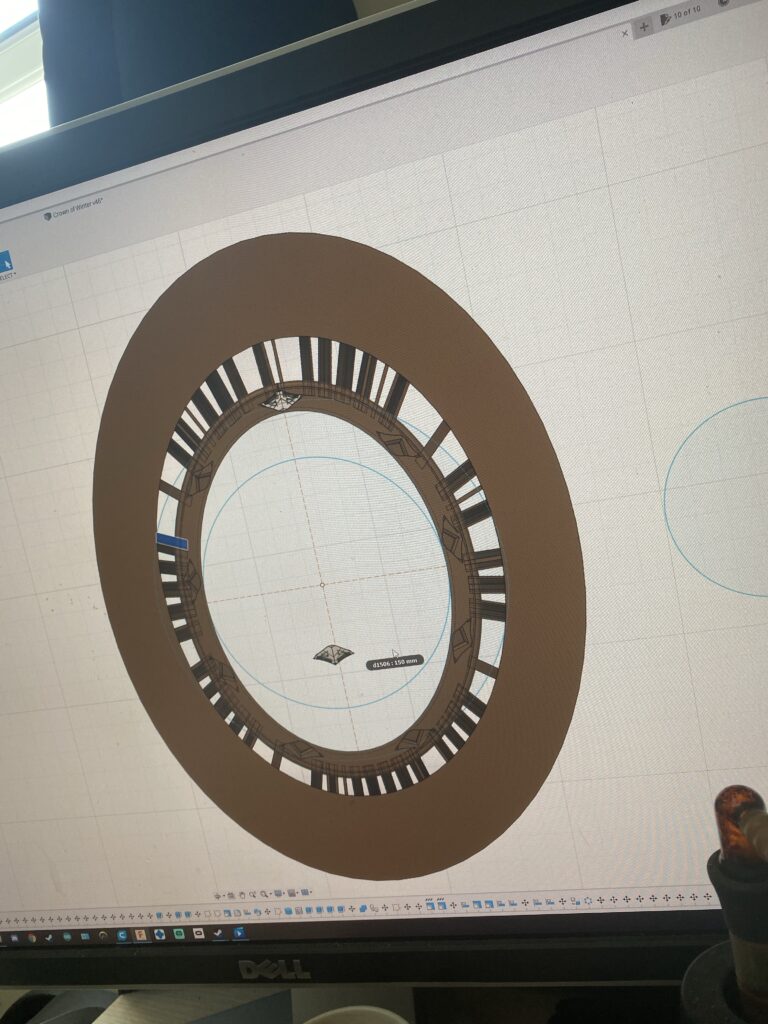
Then things got a little tricky. I had to manually move and align each individual Rune. I could find no way to do this quickly, it was tedious and monotonous but absolutely essential. Once they were all moved, I combined them with a larger circle so I could scale a resize as one item and simply place the circlet in the middle of it. This was important because the circlet was no longer perfectly round (which would have made that part so much easier, but alas!)
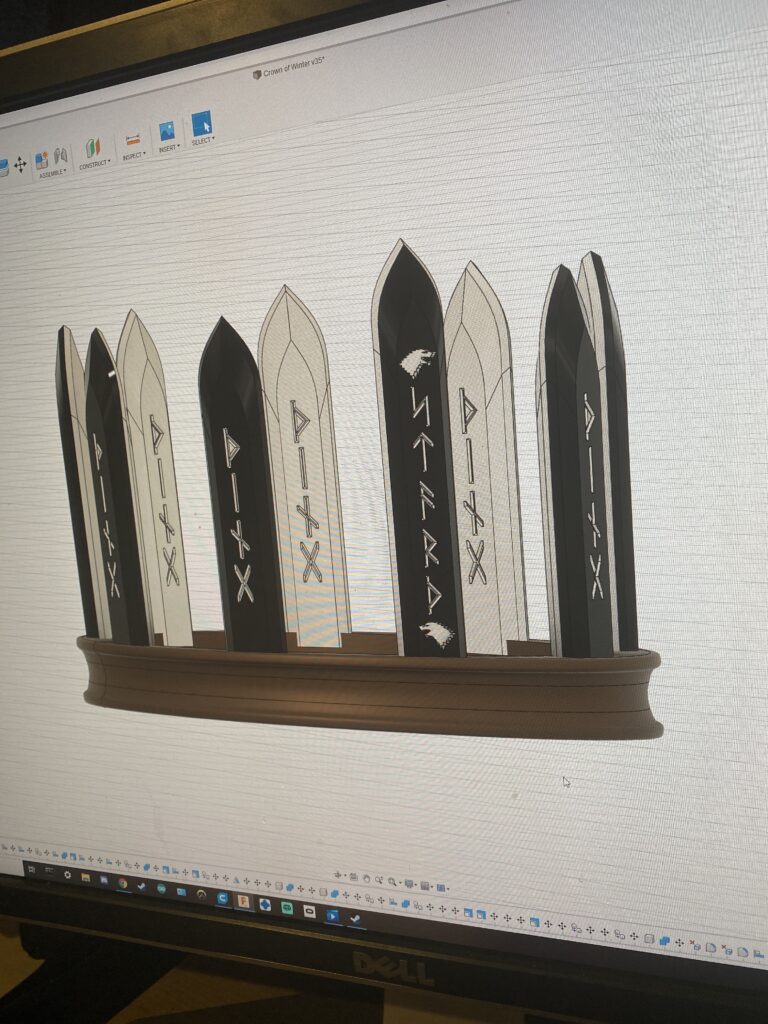
This design was years in the making, but I am finally happy to report that *this* is the design I had always wanted to complete! It has ended up exactly as I wanted it! I might need to tweak a couple of sizes or ratios (and I already miss having the runes be more poetic), but ultimately the design part is now completed!
Build
For the Finished life-sized version, the circlet will be printed in PLA, and the spikes in resin, while the whole mini Finished version will be printed in resin. Once I have this Crown of Winter line completely finished, I’ll look at offering Raw Build versions made completely out of PLA as a more price-conscious option.
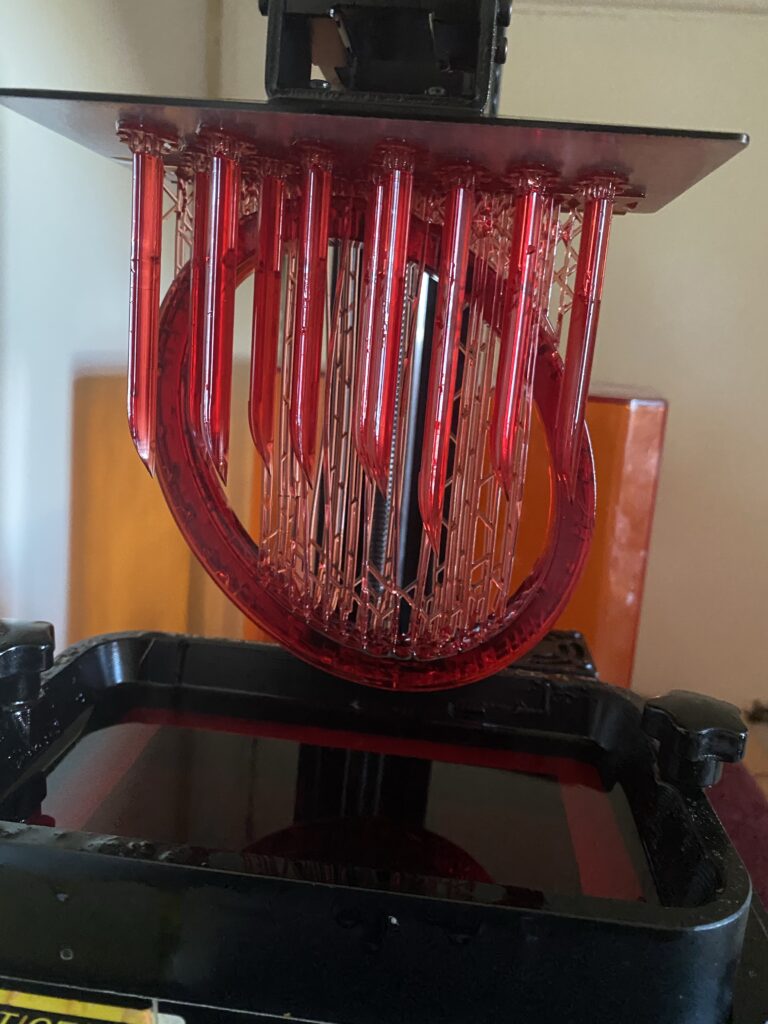
Although the print takes a while and uses a fair amount of the resin, the entire Mini version can be printed in a single go.
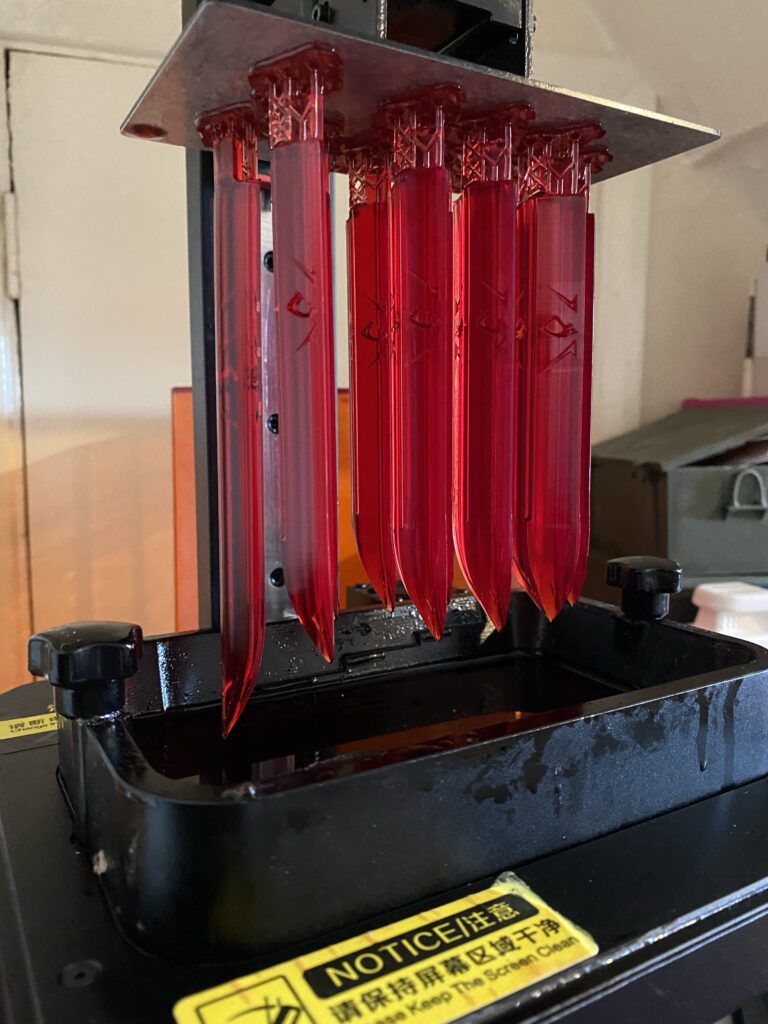
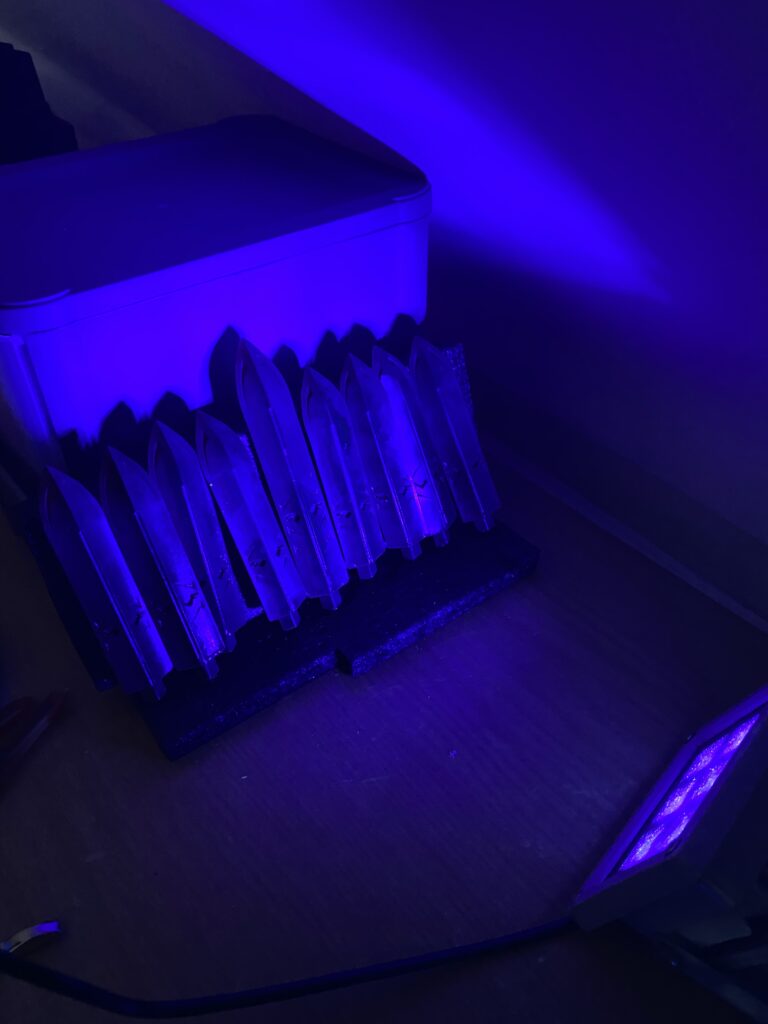
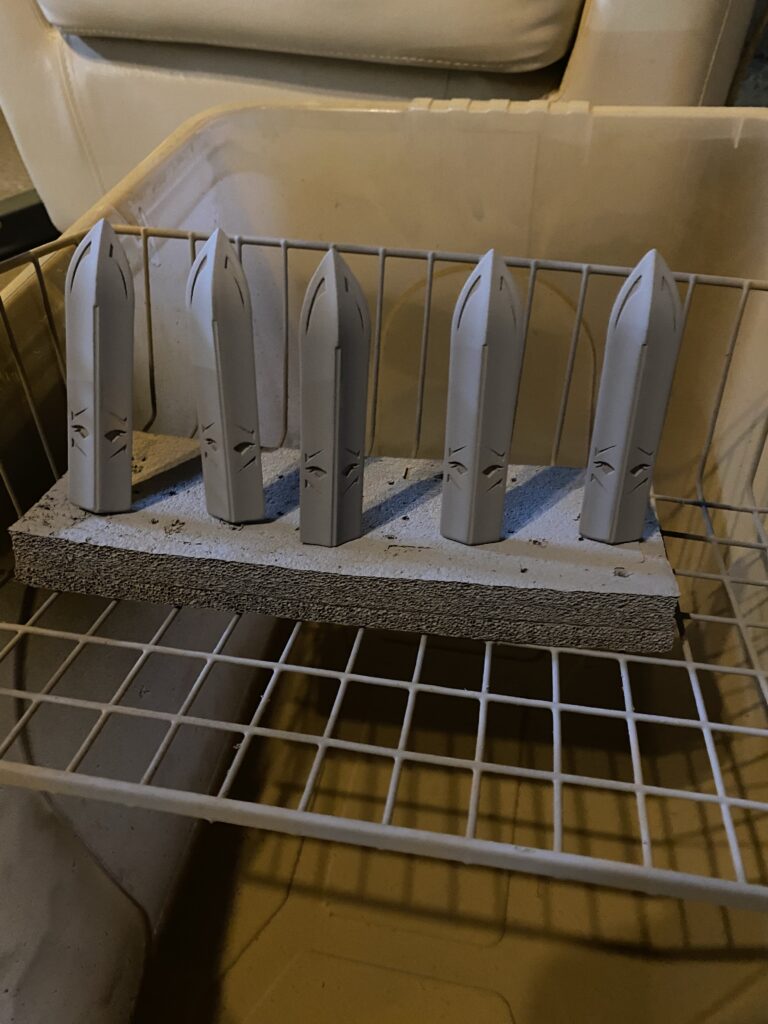
And the spikes coming off of the resin printer.
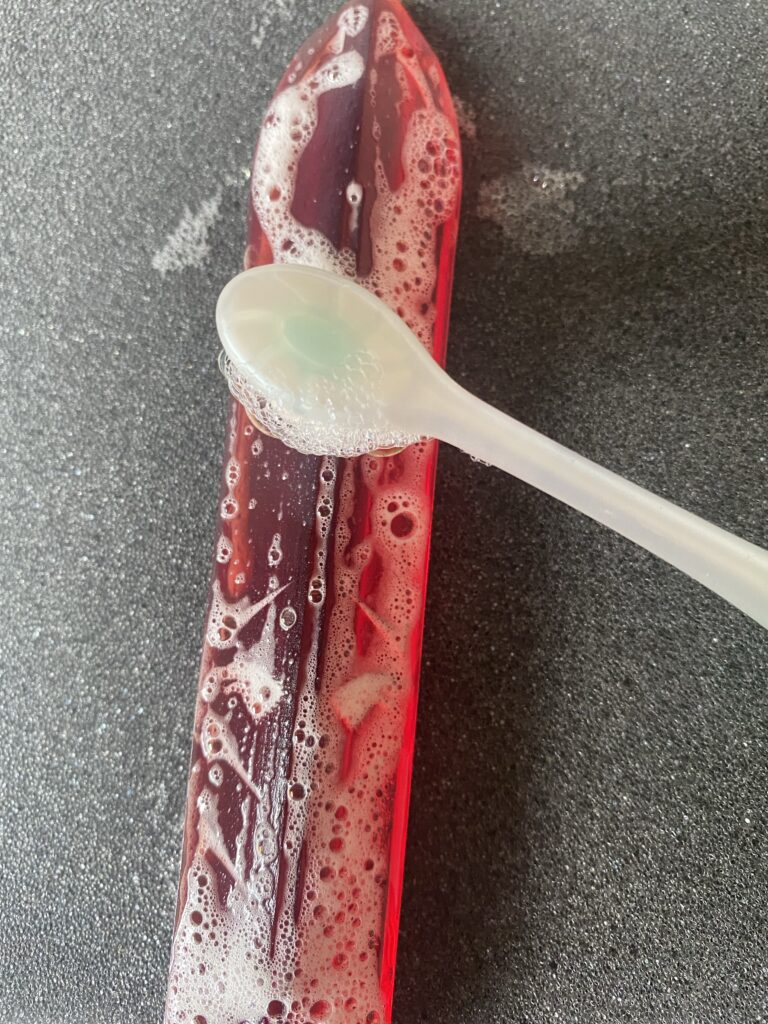
As with all resin prints, getting them cleaned is part of the process! I use a soft dental brush and a small amount of washing liquid to carefully remove any excess resin.
UV Blacklight are always gonna be cool. No matter what. Crown of Winter or any other thing.
The support material was either going to traumatize me during removal, or just snap out in a super satisfying manner. I’m elated to report it was the latter of the two here! Although moving forward I’ll be prioritising the “Trees” support option. Easier to remove, just as stable and far more fitting given the source material.
And to get the best look from the Runes, I went around them neatening them up with a fine metal file.
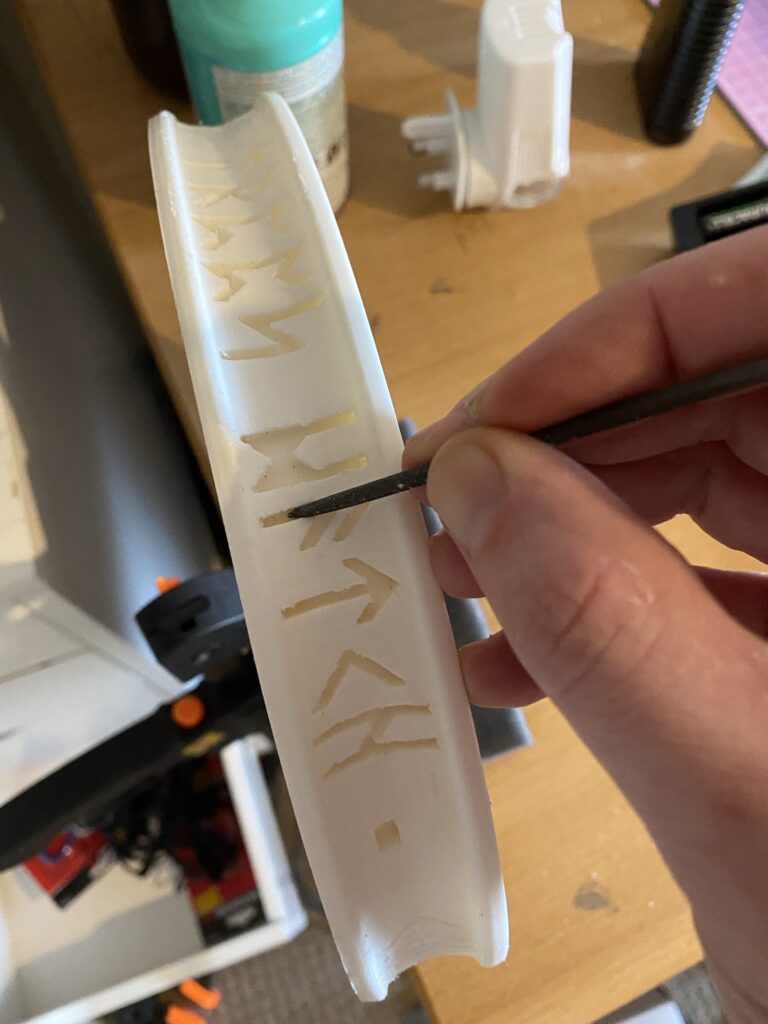
Amazing! All of the components are ready and waiting to be primed!
A little priming before we start… well, we all know what comes next at this stage, ugh.
First coat on the spikes, but I had to be a little bit creative to ensure no marks on the circlet while spraying this Crown of Winter.
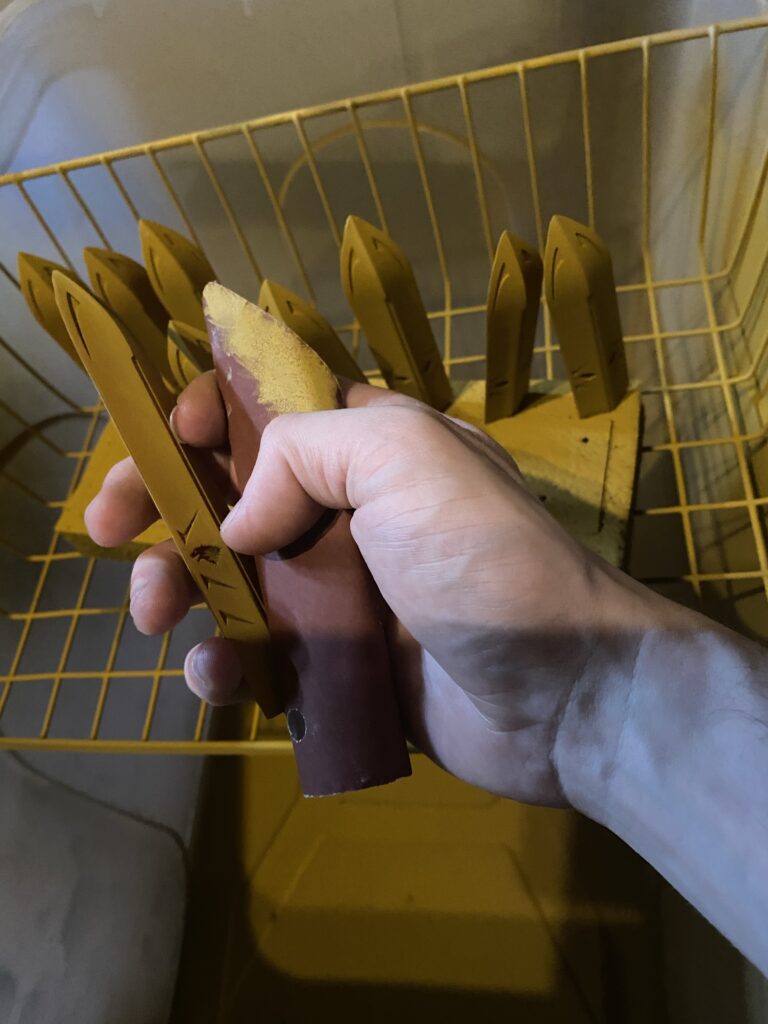
I swear I complain about sanding in every article. Just an observation, I’ve no intention of stopping. So sanding! (Also, please don’t try one handed sanding for any purpose other than trying to get a picture of one handed sanding.)
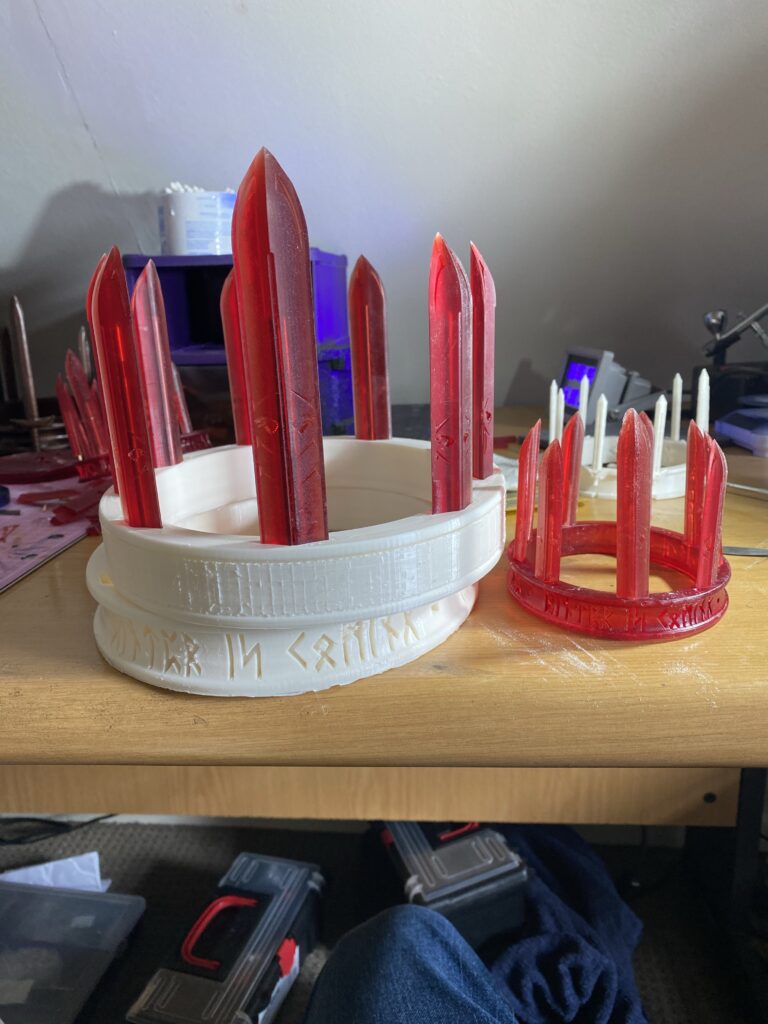
I temporarily assembled the life-sized version while halfway through the Prime/Sand dance just to get a look at it. It’s still early days, but looks rather robust and feels quite weighty!
Finish
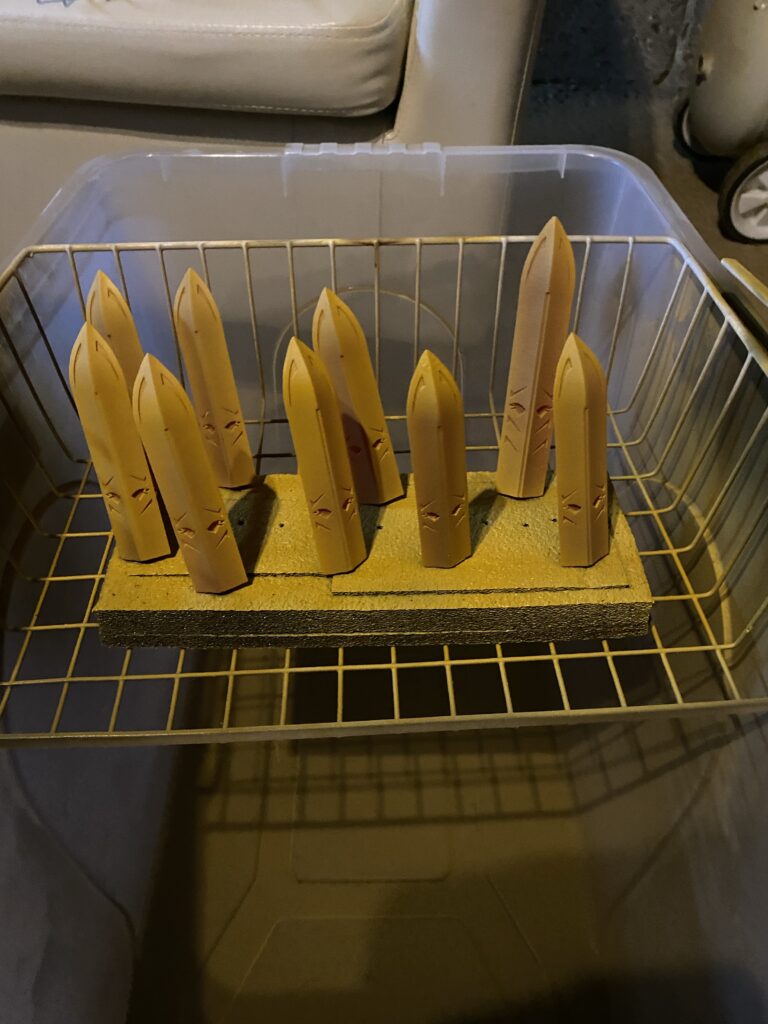
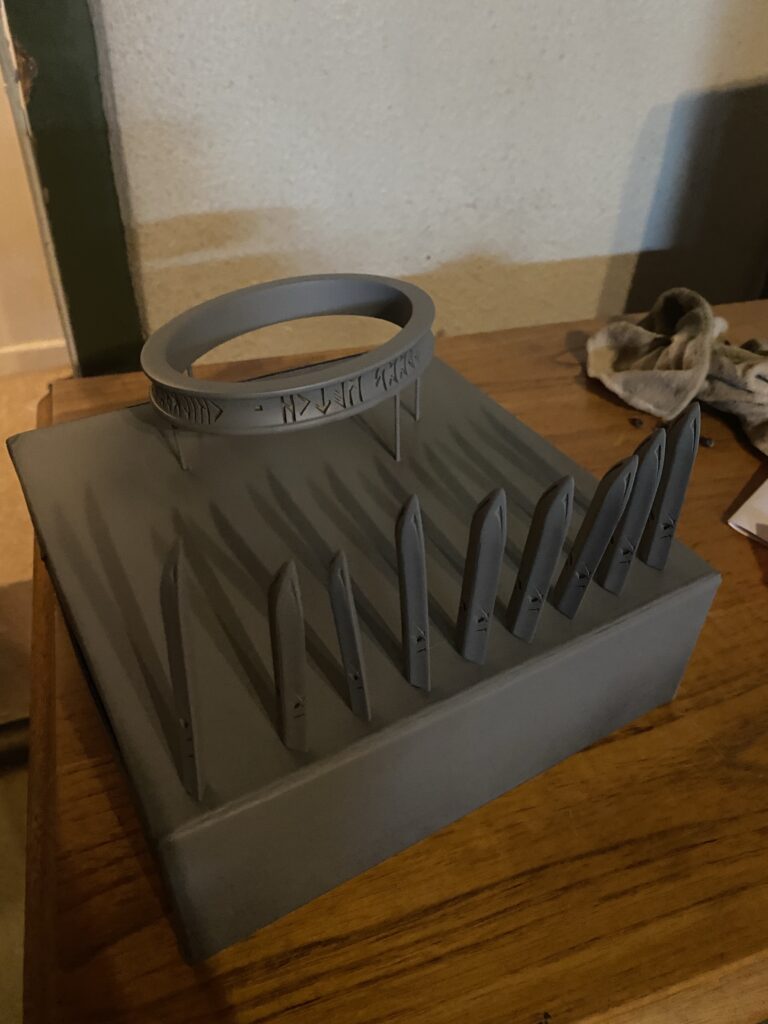
I use a yellow Filler Primer in conjunction with the sanding to get the best finish for these Crowns of Winter. Then for any components that I intend to look metallic, once sanded, I use Grey Primer, then Gloss Black and lastly the final colour. So for now, time to make things grey! To begin with, I sprayed some of the larger spikes.
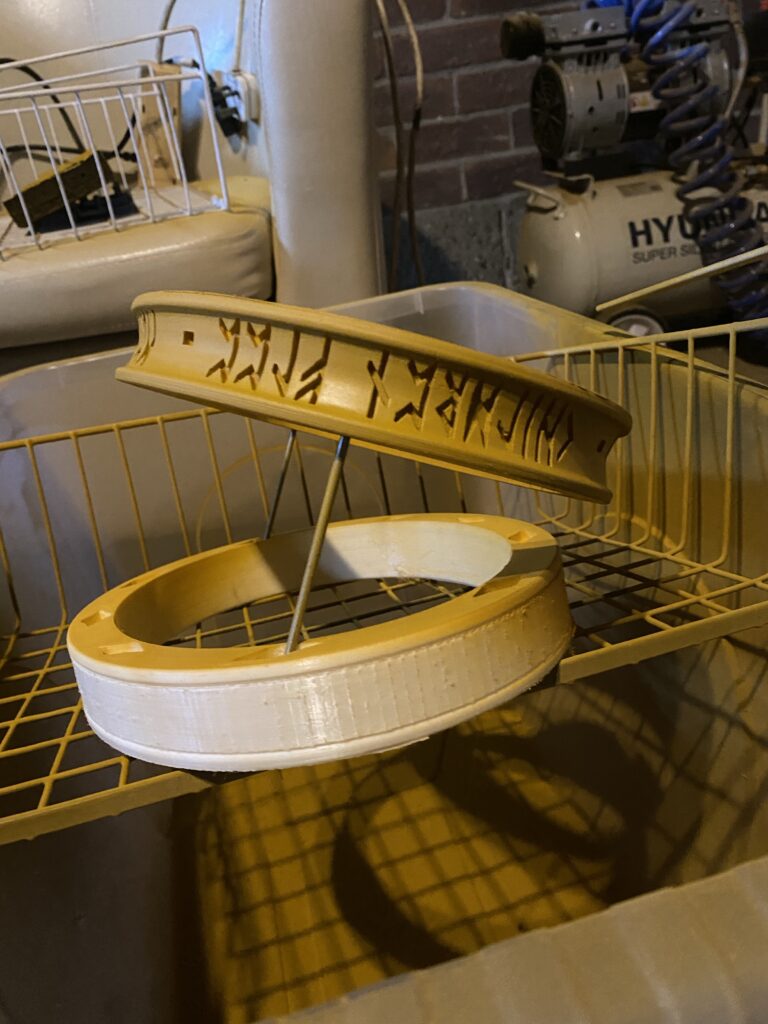
The life-size circlet got its moment to prime!
And now the whole of the Mini version. It is only on the first coat (and aiming down) that I will rest a prop on the ground. the rest of the time it needs to be hanging up. or raised from the ground
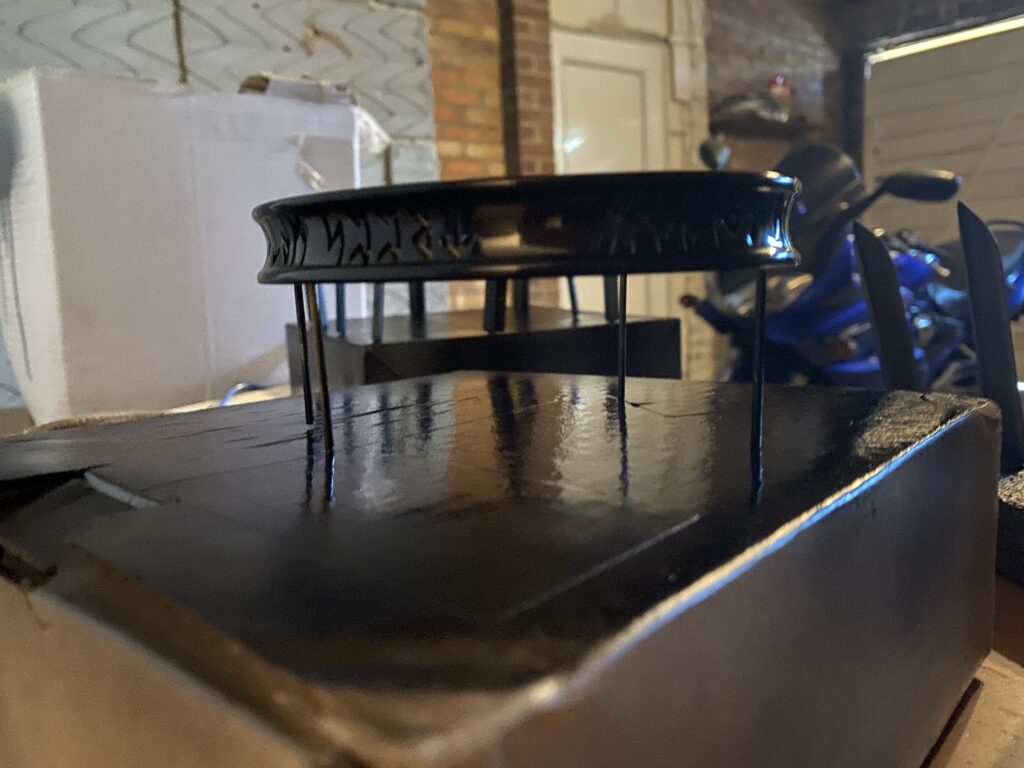
Looking good! Now all parts need a clean layer or three of gloss black paint to really make the metallic sheen on the Crown of Winter pop later.
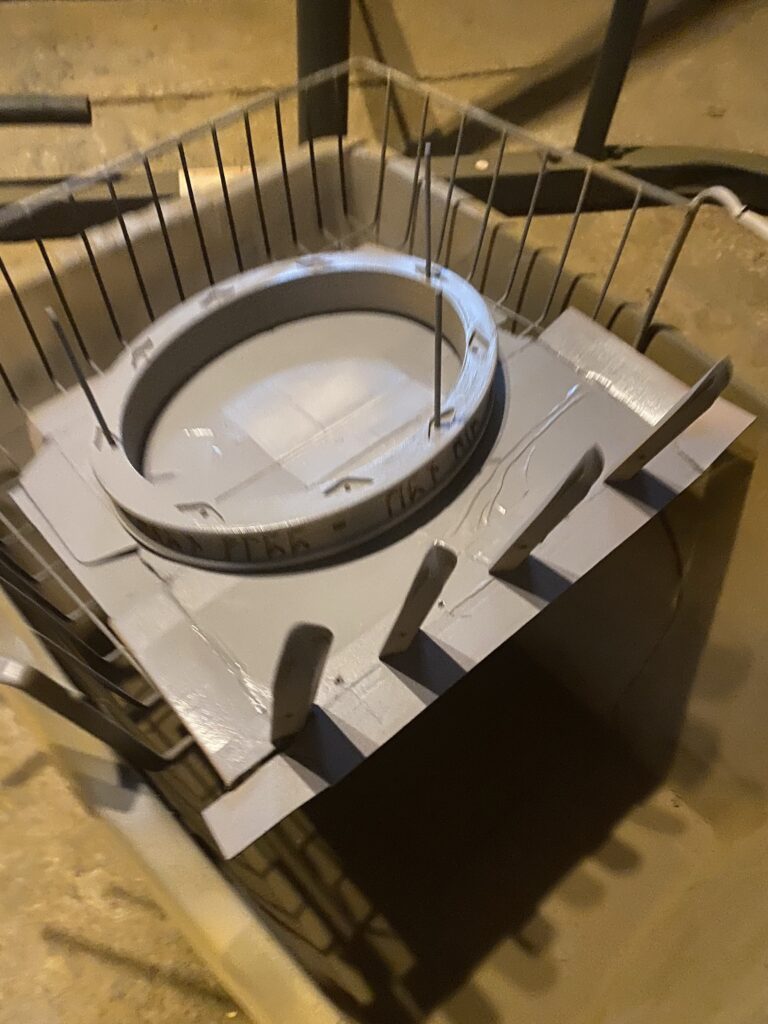
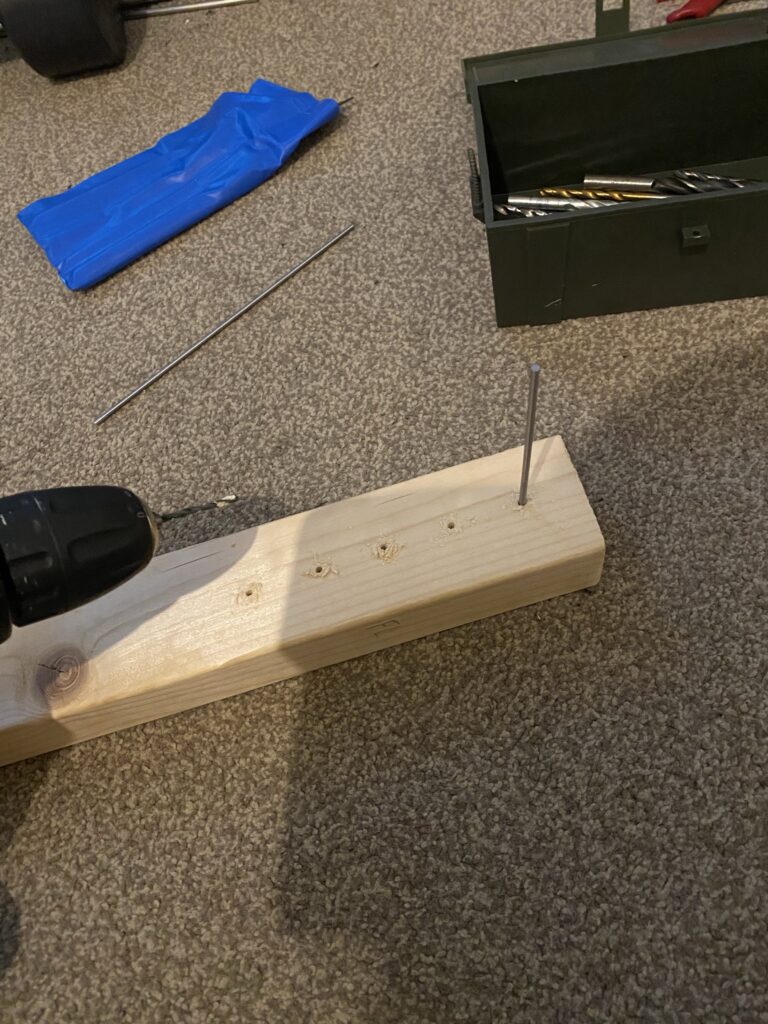
An important caveat of this design is that each component has a part of it that will not be viewable in the finished piece which I can support with a small metal rod during the finish stage. This will be essential in getting the paint finish I am after. Clips and wire will also be used to ensure a fingerprint-free finish while painting, allowing me to handle the item without the risk of compromising the quality of the paint job.
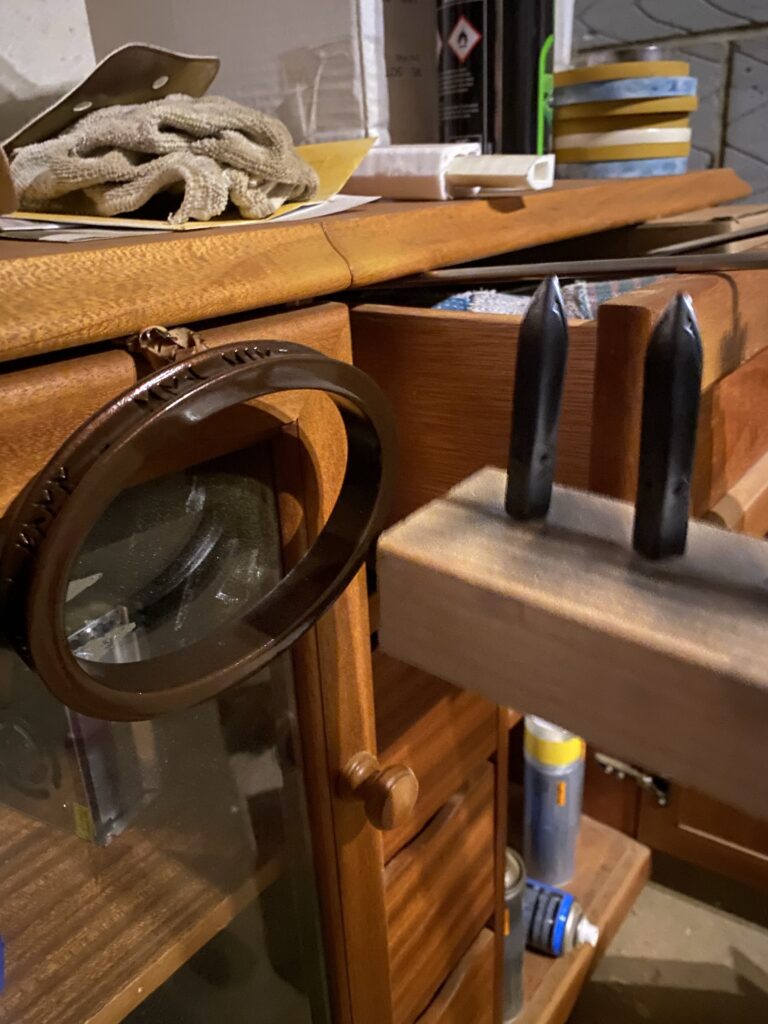
Furthermore, as I figured I’d be making a few of these, and crafting a tool for the specific task of spraying the spikes seemed like a simple and smart choice. Just a piece of wood with a few holes in to hold the spikes. Quick, easy and infinitely pragmatic!
And now the rest of the parts need to be painted black (although at this stage the life size circlet still needed work and began to lag behind the progress of the other items. You can likely see what took a little longer to sort on the inside of the headband).

For the black iron spikes, there are two colours I’m interested in trying to see which look betterbetween: Vallejo Metallic Black [71.073] and Alclad Black Chrome. I have used Vallejo Metallic Black [71.073] extensively and I know it’d be great for this purpose. That being said, if I can get the kind of finish I want out of the Alclad Black Chrome, I’ll be going with that! But I have not used this before, so it is a bit of an unknown.
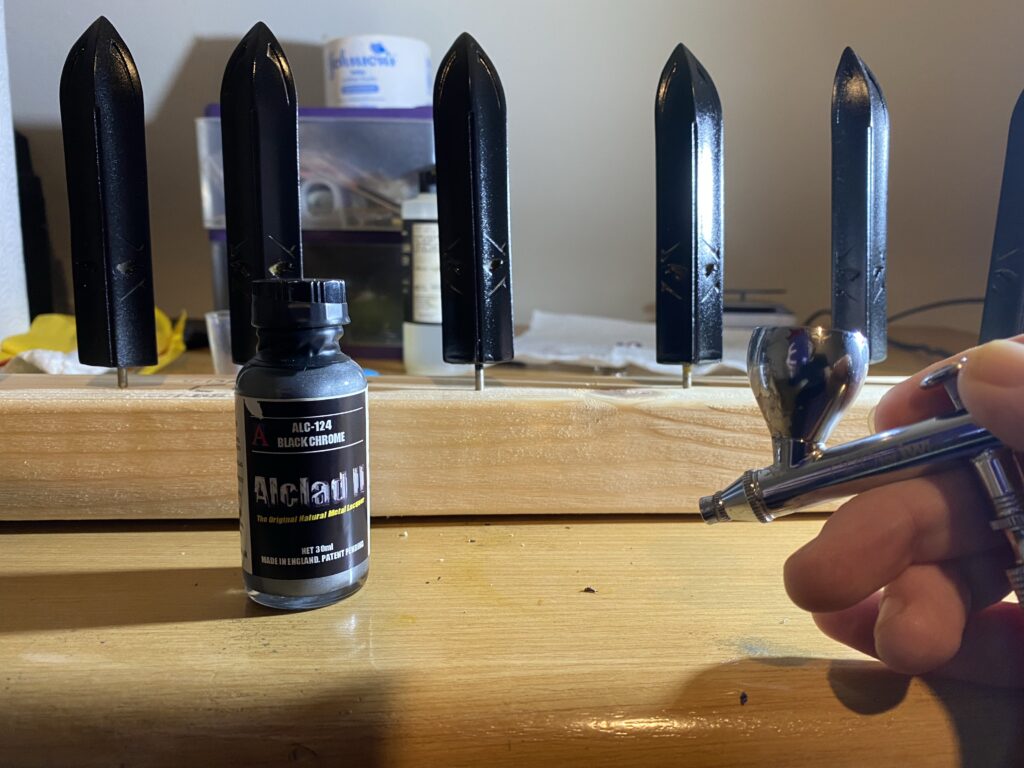
So how does it look? How did my first experience with this paint go? Horribly! Chalky, inconsistent and a terrible finish. I shouldn’t have expected my first time with it to go perfectly.
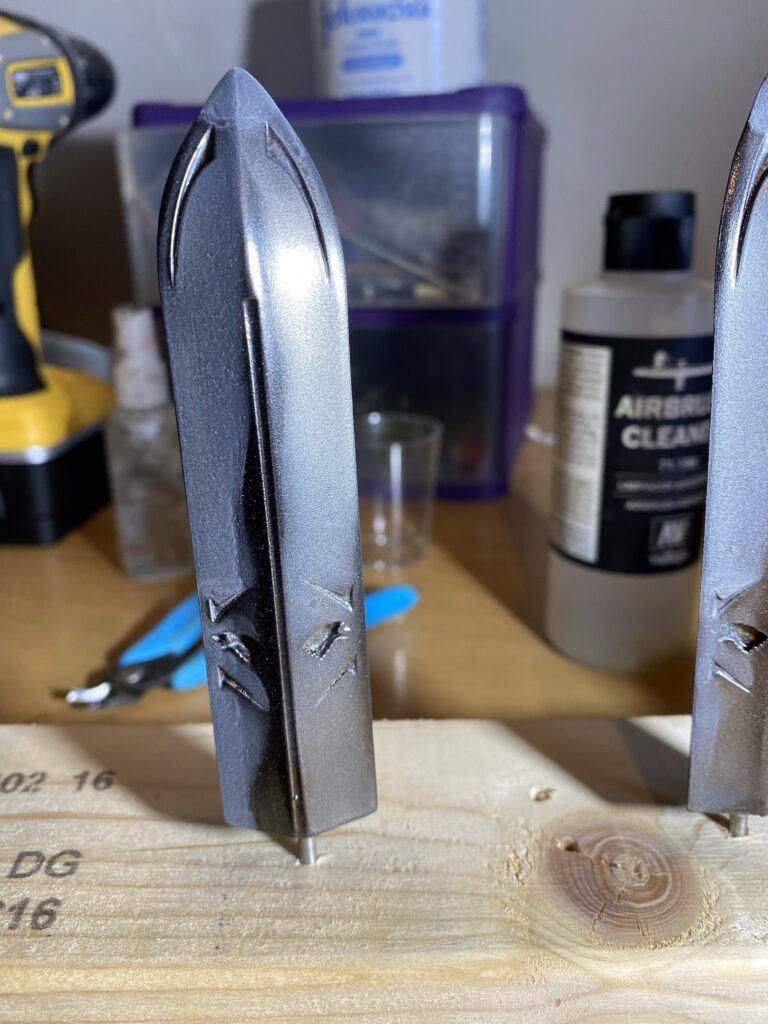
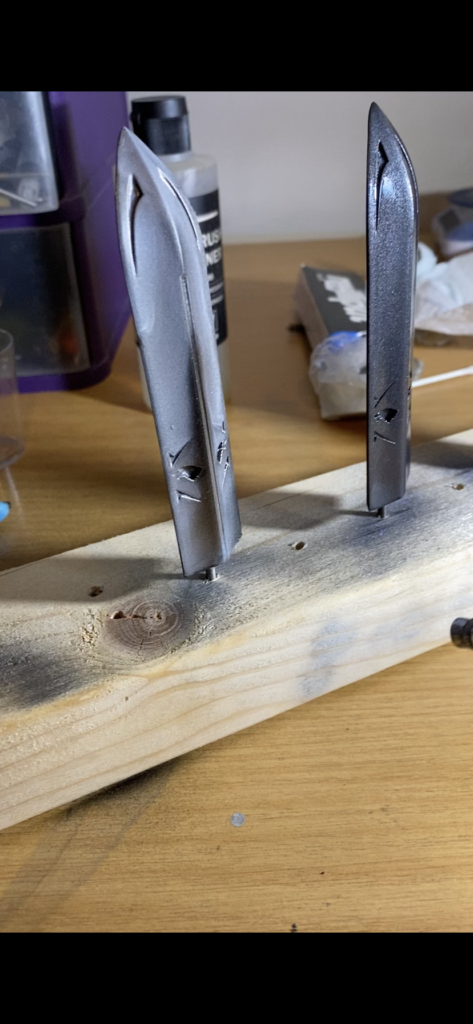
Google suggests that it is user error, and I am inclined to believe that. The pressure I used was apparently too high and caused the paint to slightly evaporate midair. With time, I’ll play around with this paint, but for now, I am happy to move forward with good old reliable Vallejo Metallic Black [71.073] on the right.
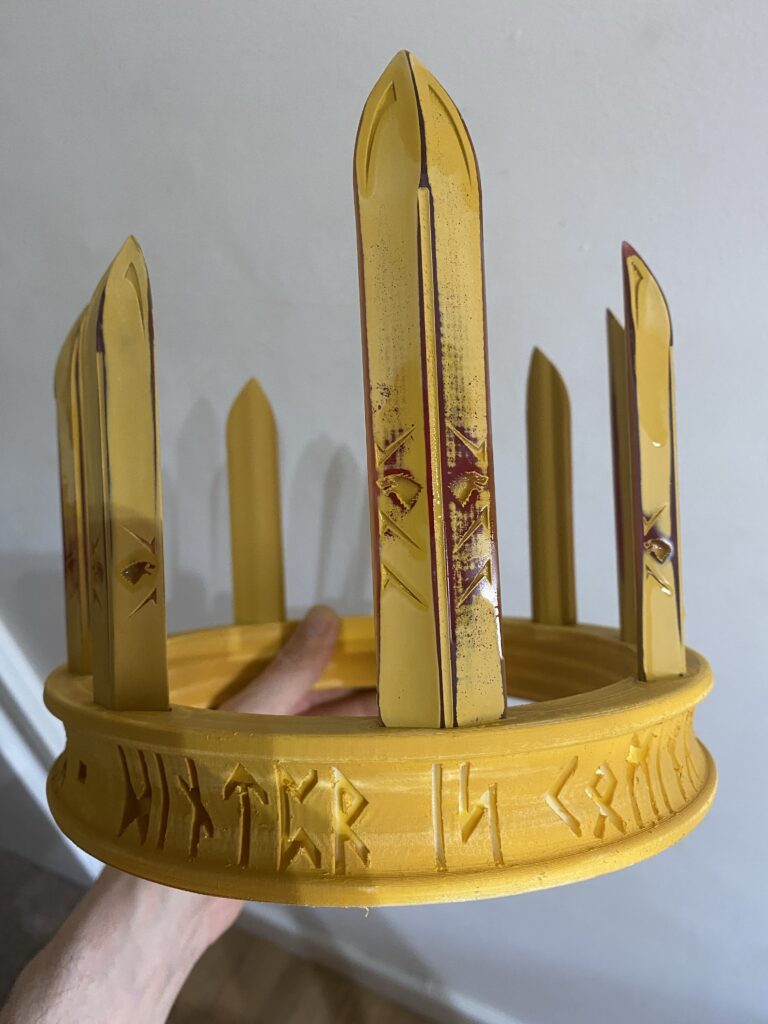
Okay, spikes looking great! Let’s get the Crown of Winter circlet coloured! I’m using Ford Roman Bronze here, as it gives it that dark earthen tone I’m looking for, without too much of a metallic shine. First coat went on nicely!

A couple of coats and an overnight wait later, and it’s time to varnish!
This is one of the easiest items to assemble in the last stage, and this item is completed!! Both of them, in fact.
Result
As of right this very moment, 03:15 on 8/11/2021, this is the best-finished piece I have ever created. I am so proud of these items and the end result of Robb Stark’s Crown of Winter was far greater than I thought it would have ever been.

Thanks for reading!
If you enjoyed this, you might like some of the related articles from the Overview, or perhaps a different Project altogether?
Love what you saw? Got a project in mind? Feel free to reach out and let me know!